Delaware Water Gap

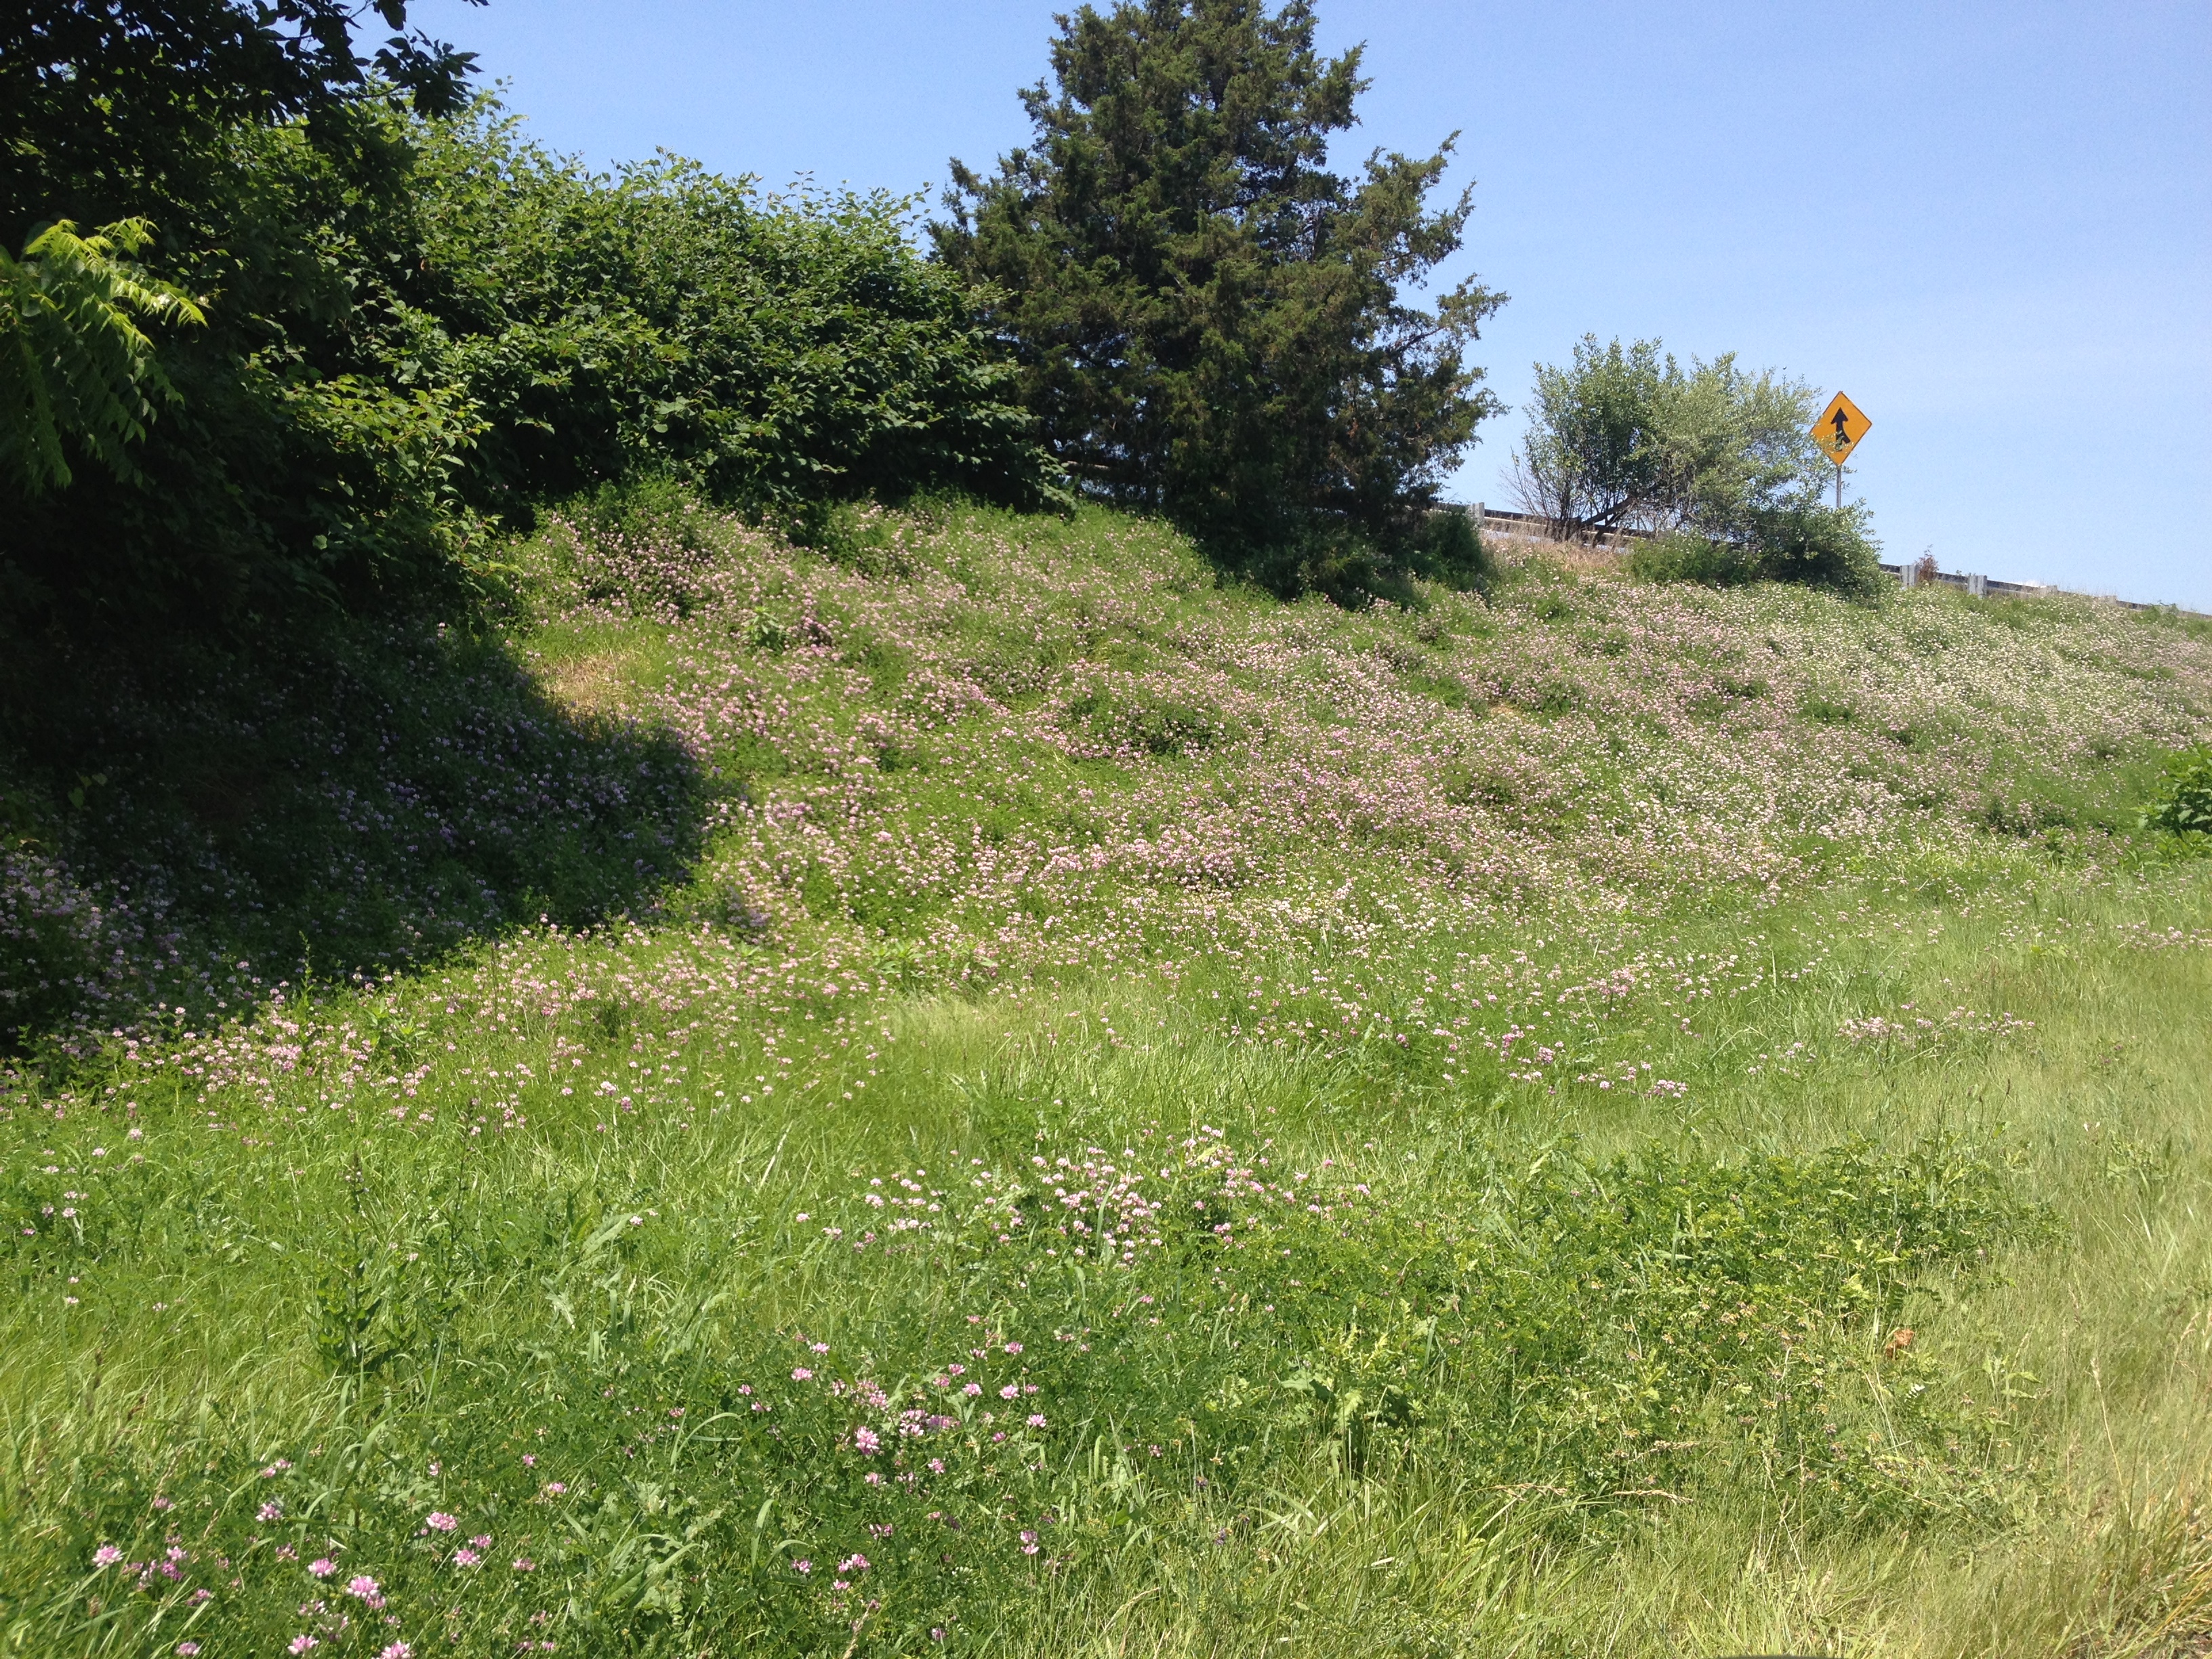
This past weekend we stayed at Camp Taylor near the Delaware Water Gap in northwest New Jersey.  John invited a friend on this trip.  They walked to our house after school where I had everything packed up and ready to go.  On our way north we were stuck in stopped traffic for 15 minutes while a road crew poured some fresh concrete.  While we were sitting there I noticed all the pretty flowers alongside the entrance ramp to route 202.

 Flowers on the Highway

After making it through the traffic jam we drove an hour north to Buttzville, NJ where we stopped at the famous Hot Dog Johnny’s hot dog stand.  Personally I’m always disappointed that they don’t offer chili or sour kraut for my hot dog at this place.  But, it’s a local icon so I feel compelled to stop.  And, of course, the kids enjoy it.  I don’t have a picture from this place because the boys refused to have their picture taken in front of the big road sign and I just didn’t feel up to the effort of maneuvering the Bambi into a photogenic pose.  So, on we went.

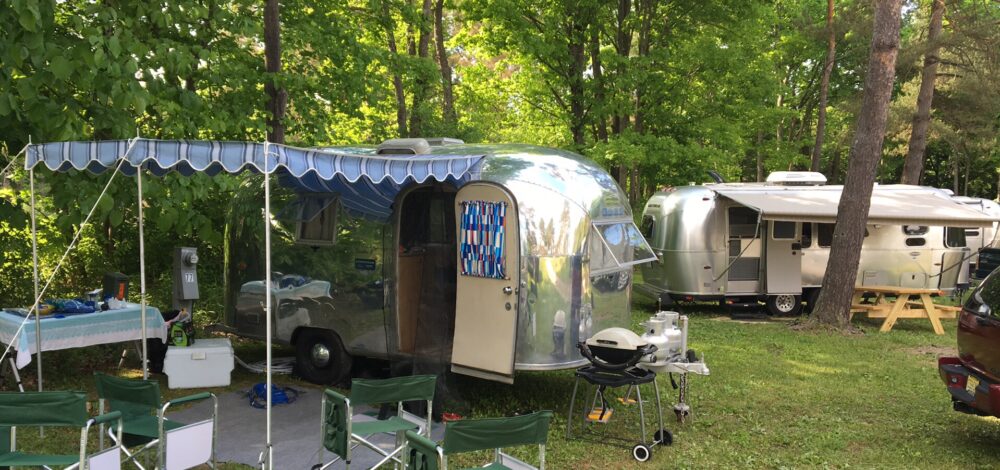
We arrived at the campground about 40 minutes later.  It was hard to miss what with all the colorful braziers strung across the front lawn.

 Braziers on the Fence

A group from Sisters on the Fly were spending the weekend at the campground.  What a bunch of neat and colorful small trailers they had.  I should have taken pictures!  They had Scotties and Scouts and all different flavors of trailers.  I spoke with one woman who had driven down from Canada.  After speaking with her I was convinced that I should sign up to join them on some of their adventures.  Unfortunately I was not eligible because I don’t come with my own bra.

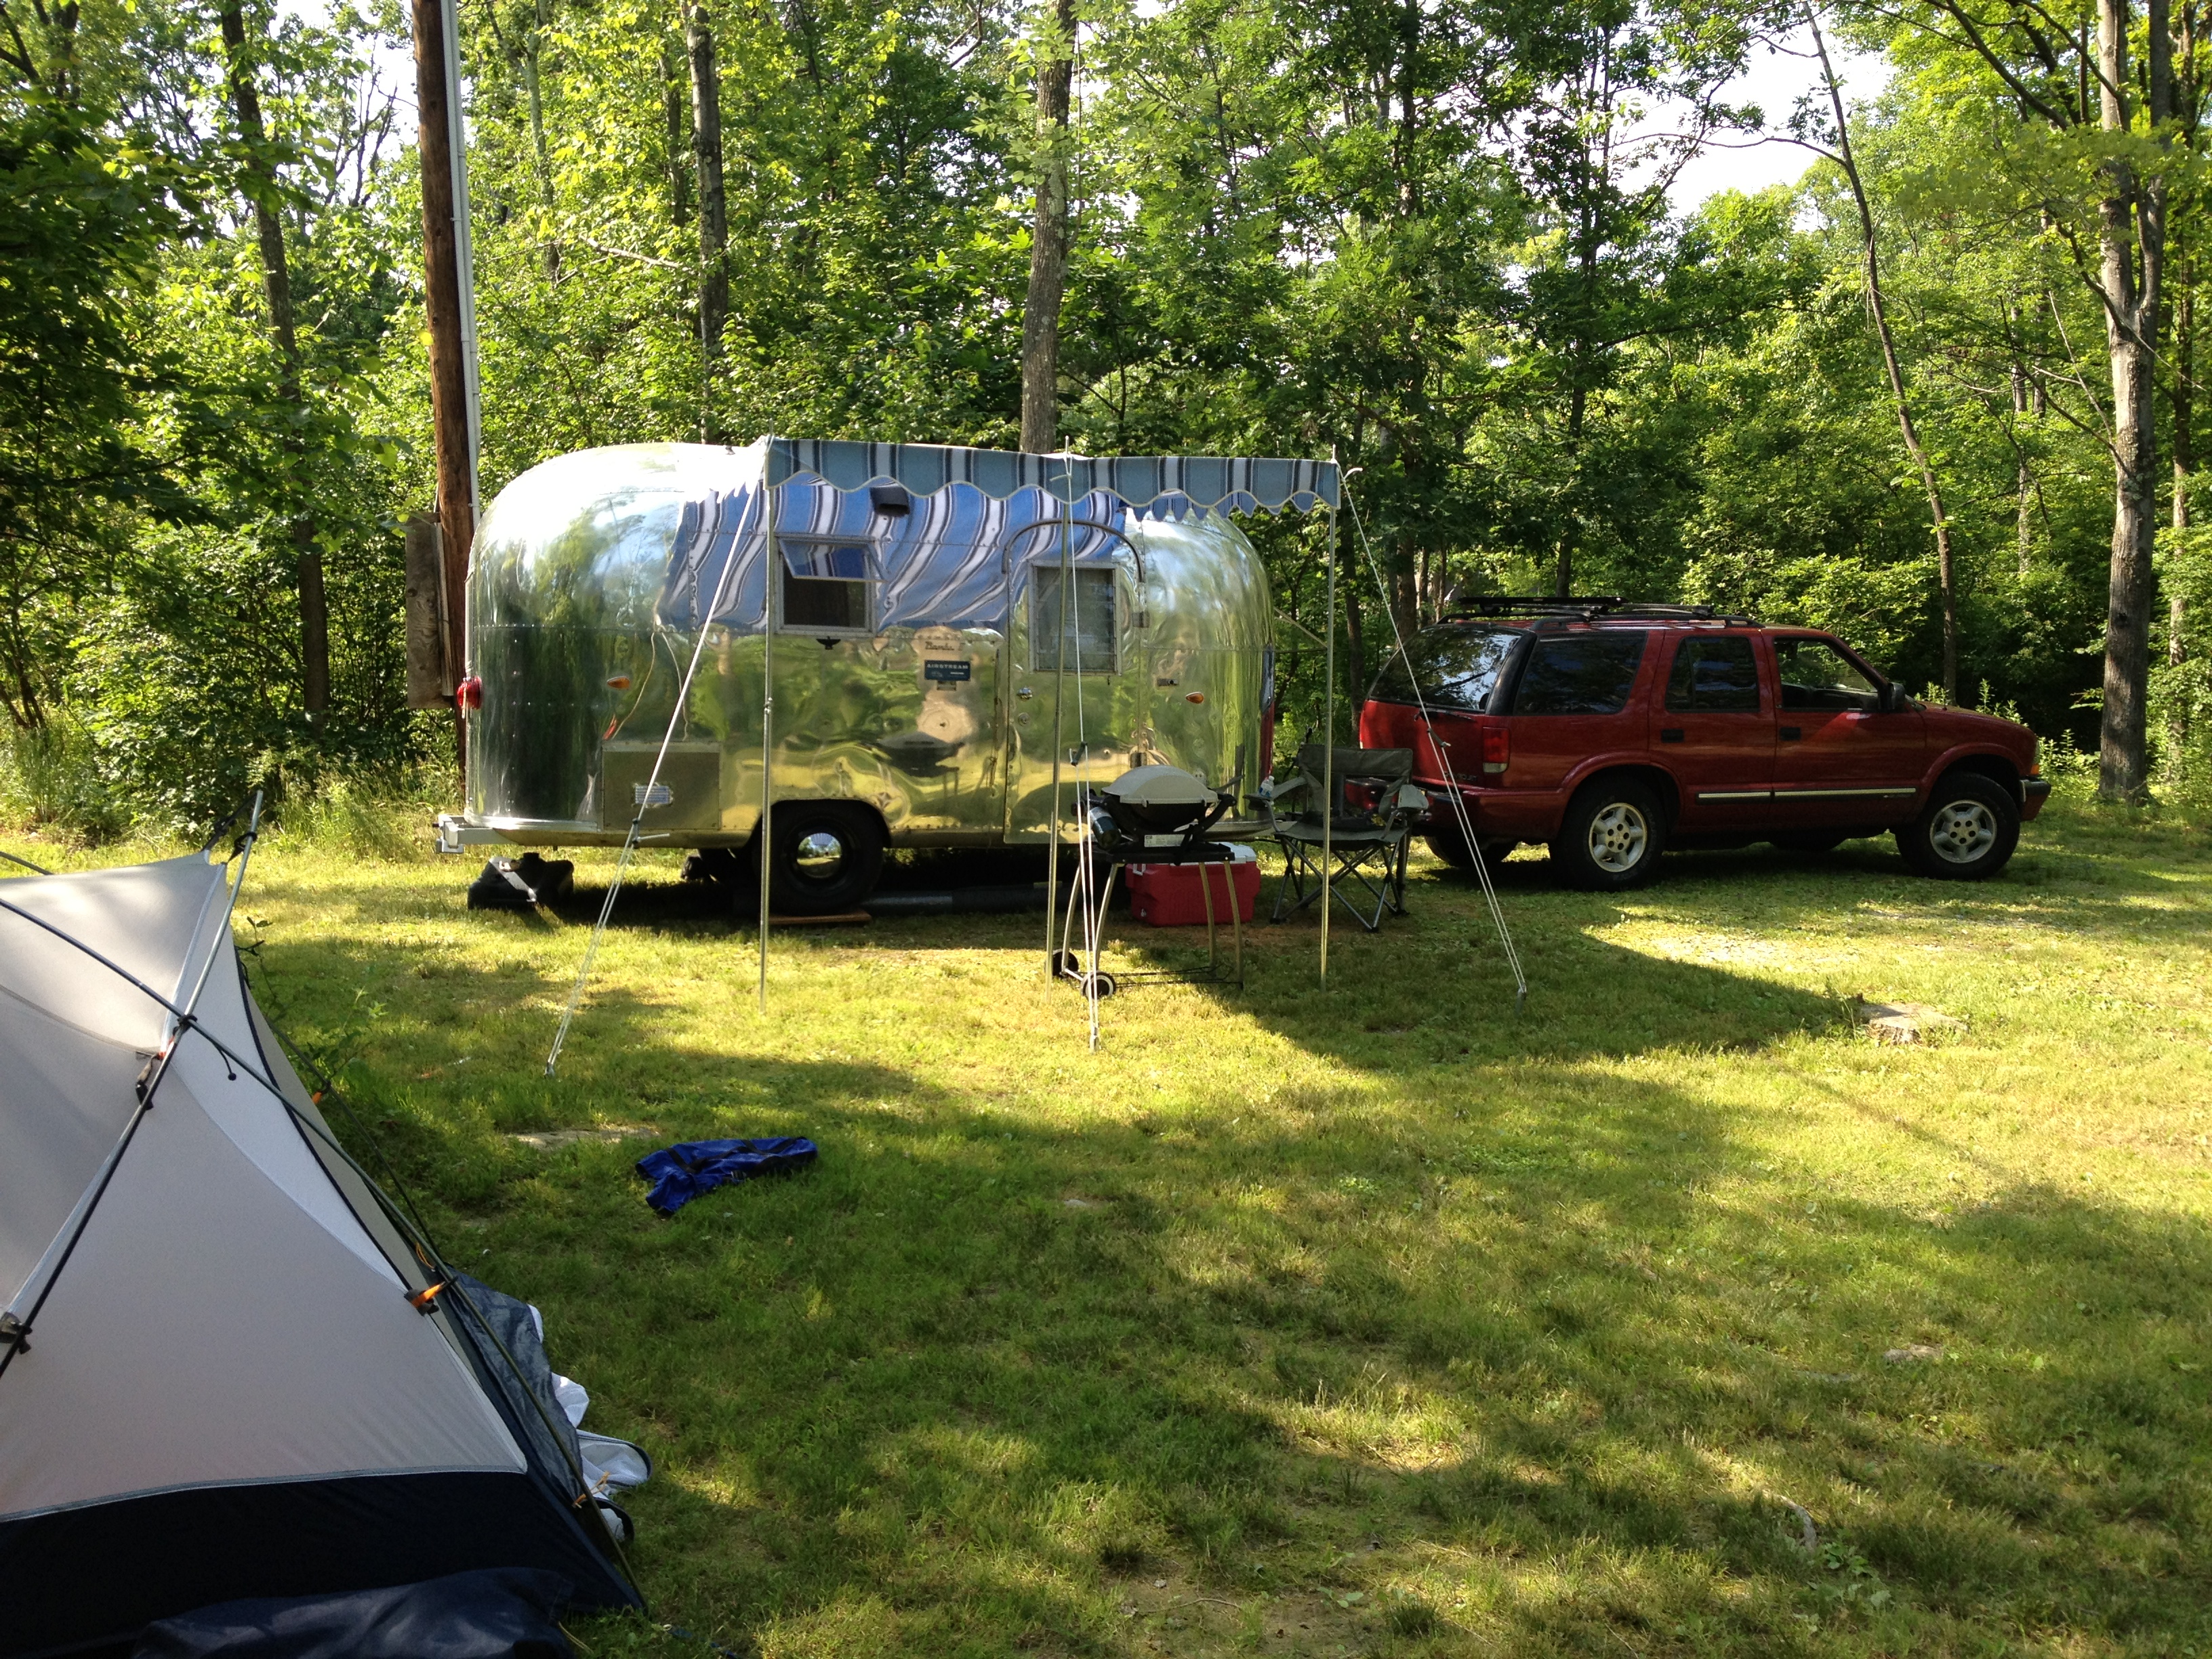
We set up camp in a small clearing right across the road from the camp office.  Each site was very private.  We’ve become used to having sites arranged right next to one another.  It was nice to have a little separation from our neighbors this time.  We set up the tent for the boys and new trailer awning in no time.

Camp Taylor Campsite

After setting up camp the boys went to the arcade.  After eating some burgers from the grill the boys played mini golf.  Then we all sat around the camp fire until it was time for bed.  The bed in the trailer is so much more comfortable than the Thermarest I used to sleep on while camping.

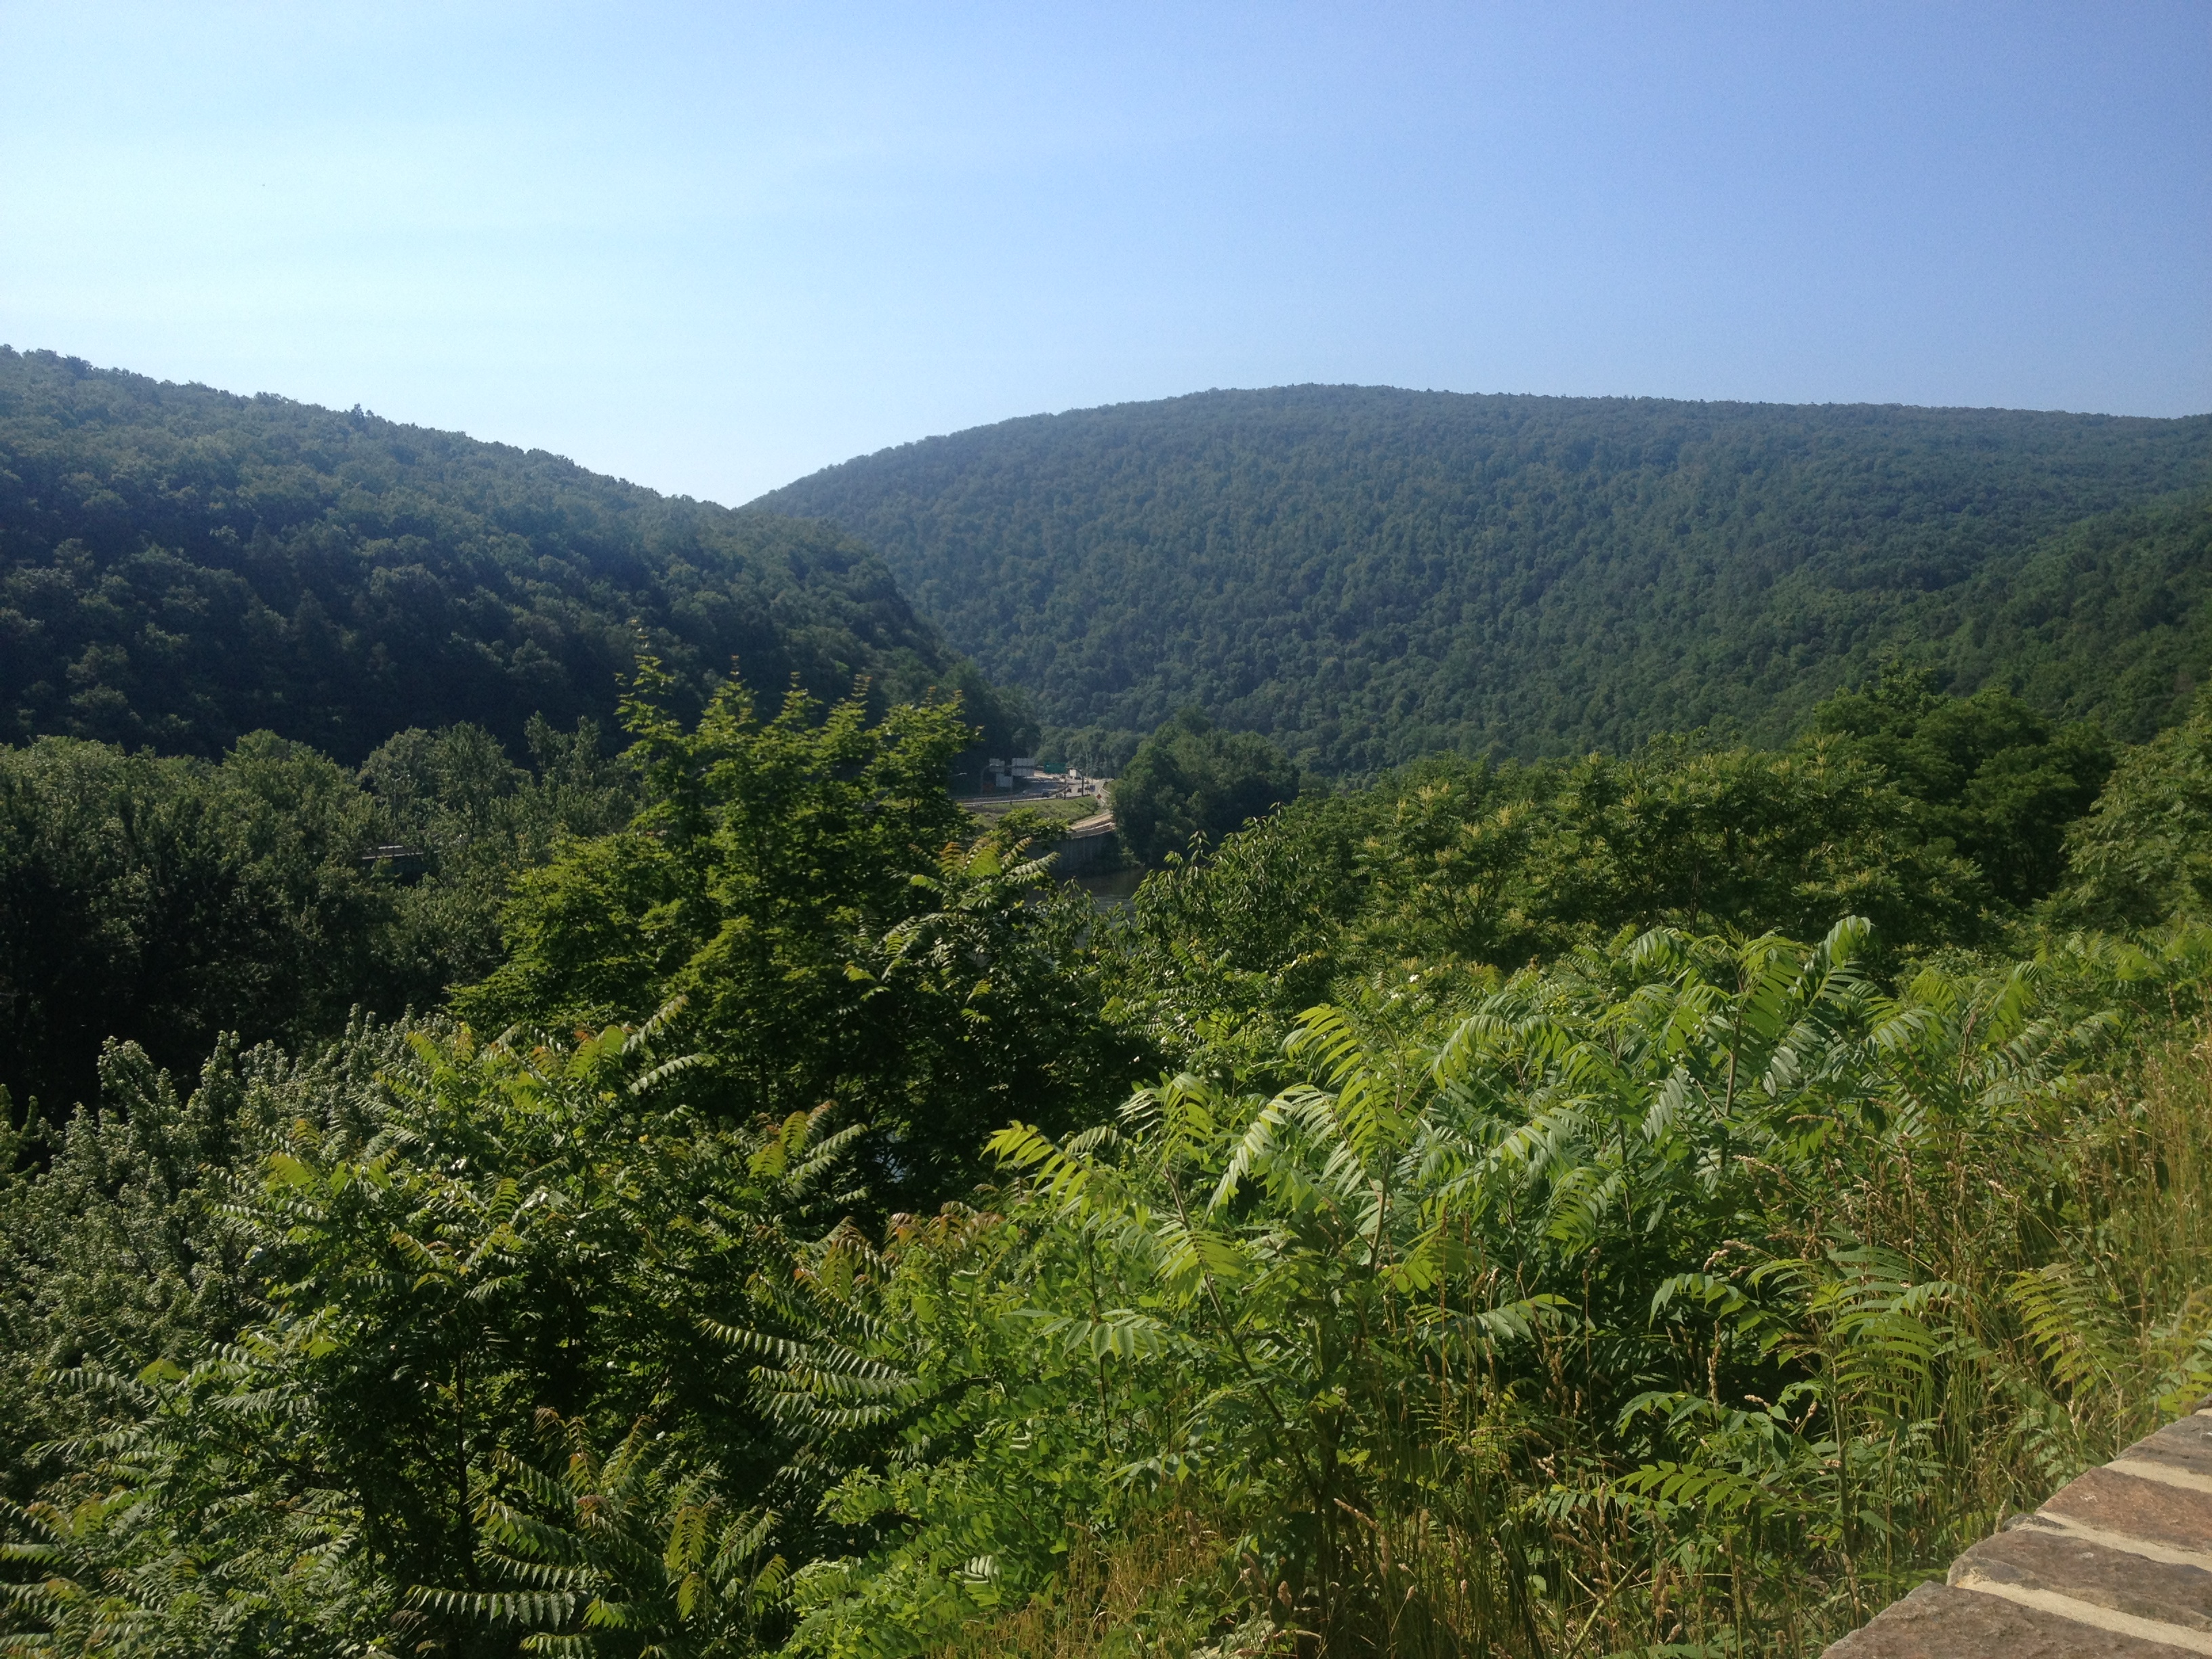
The next day we drove to the Delaware Water Gap for a hike.  Here is a view of the gap from an overlook site just off PA 611.

Delaware Water Gap

We hiked part of the way up the Mt Tammany trail.  The hike is fairly steep.  Sort of like walking up a very long staircase.  As I walked up the trail I thought of how good I felt.  It’s been a long recovery from the broken leg two years ago.  Now that I know the leg is good for hiking, I want to go more often.

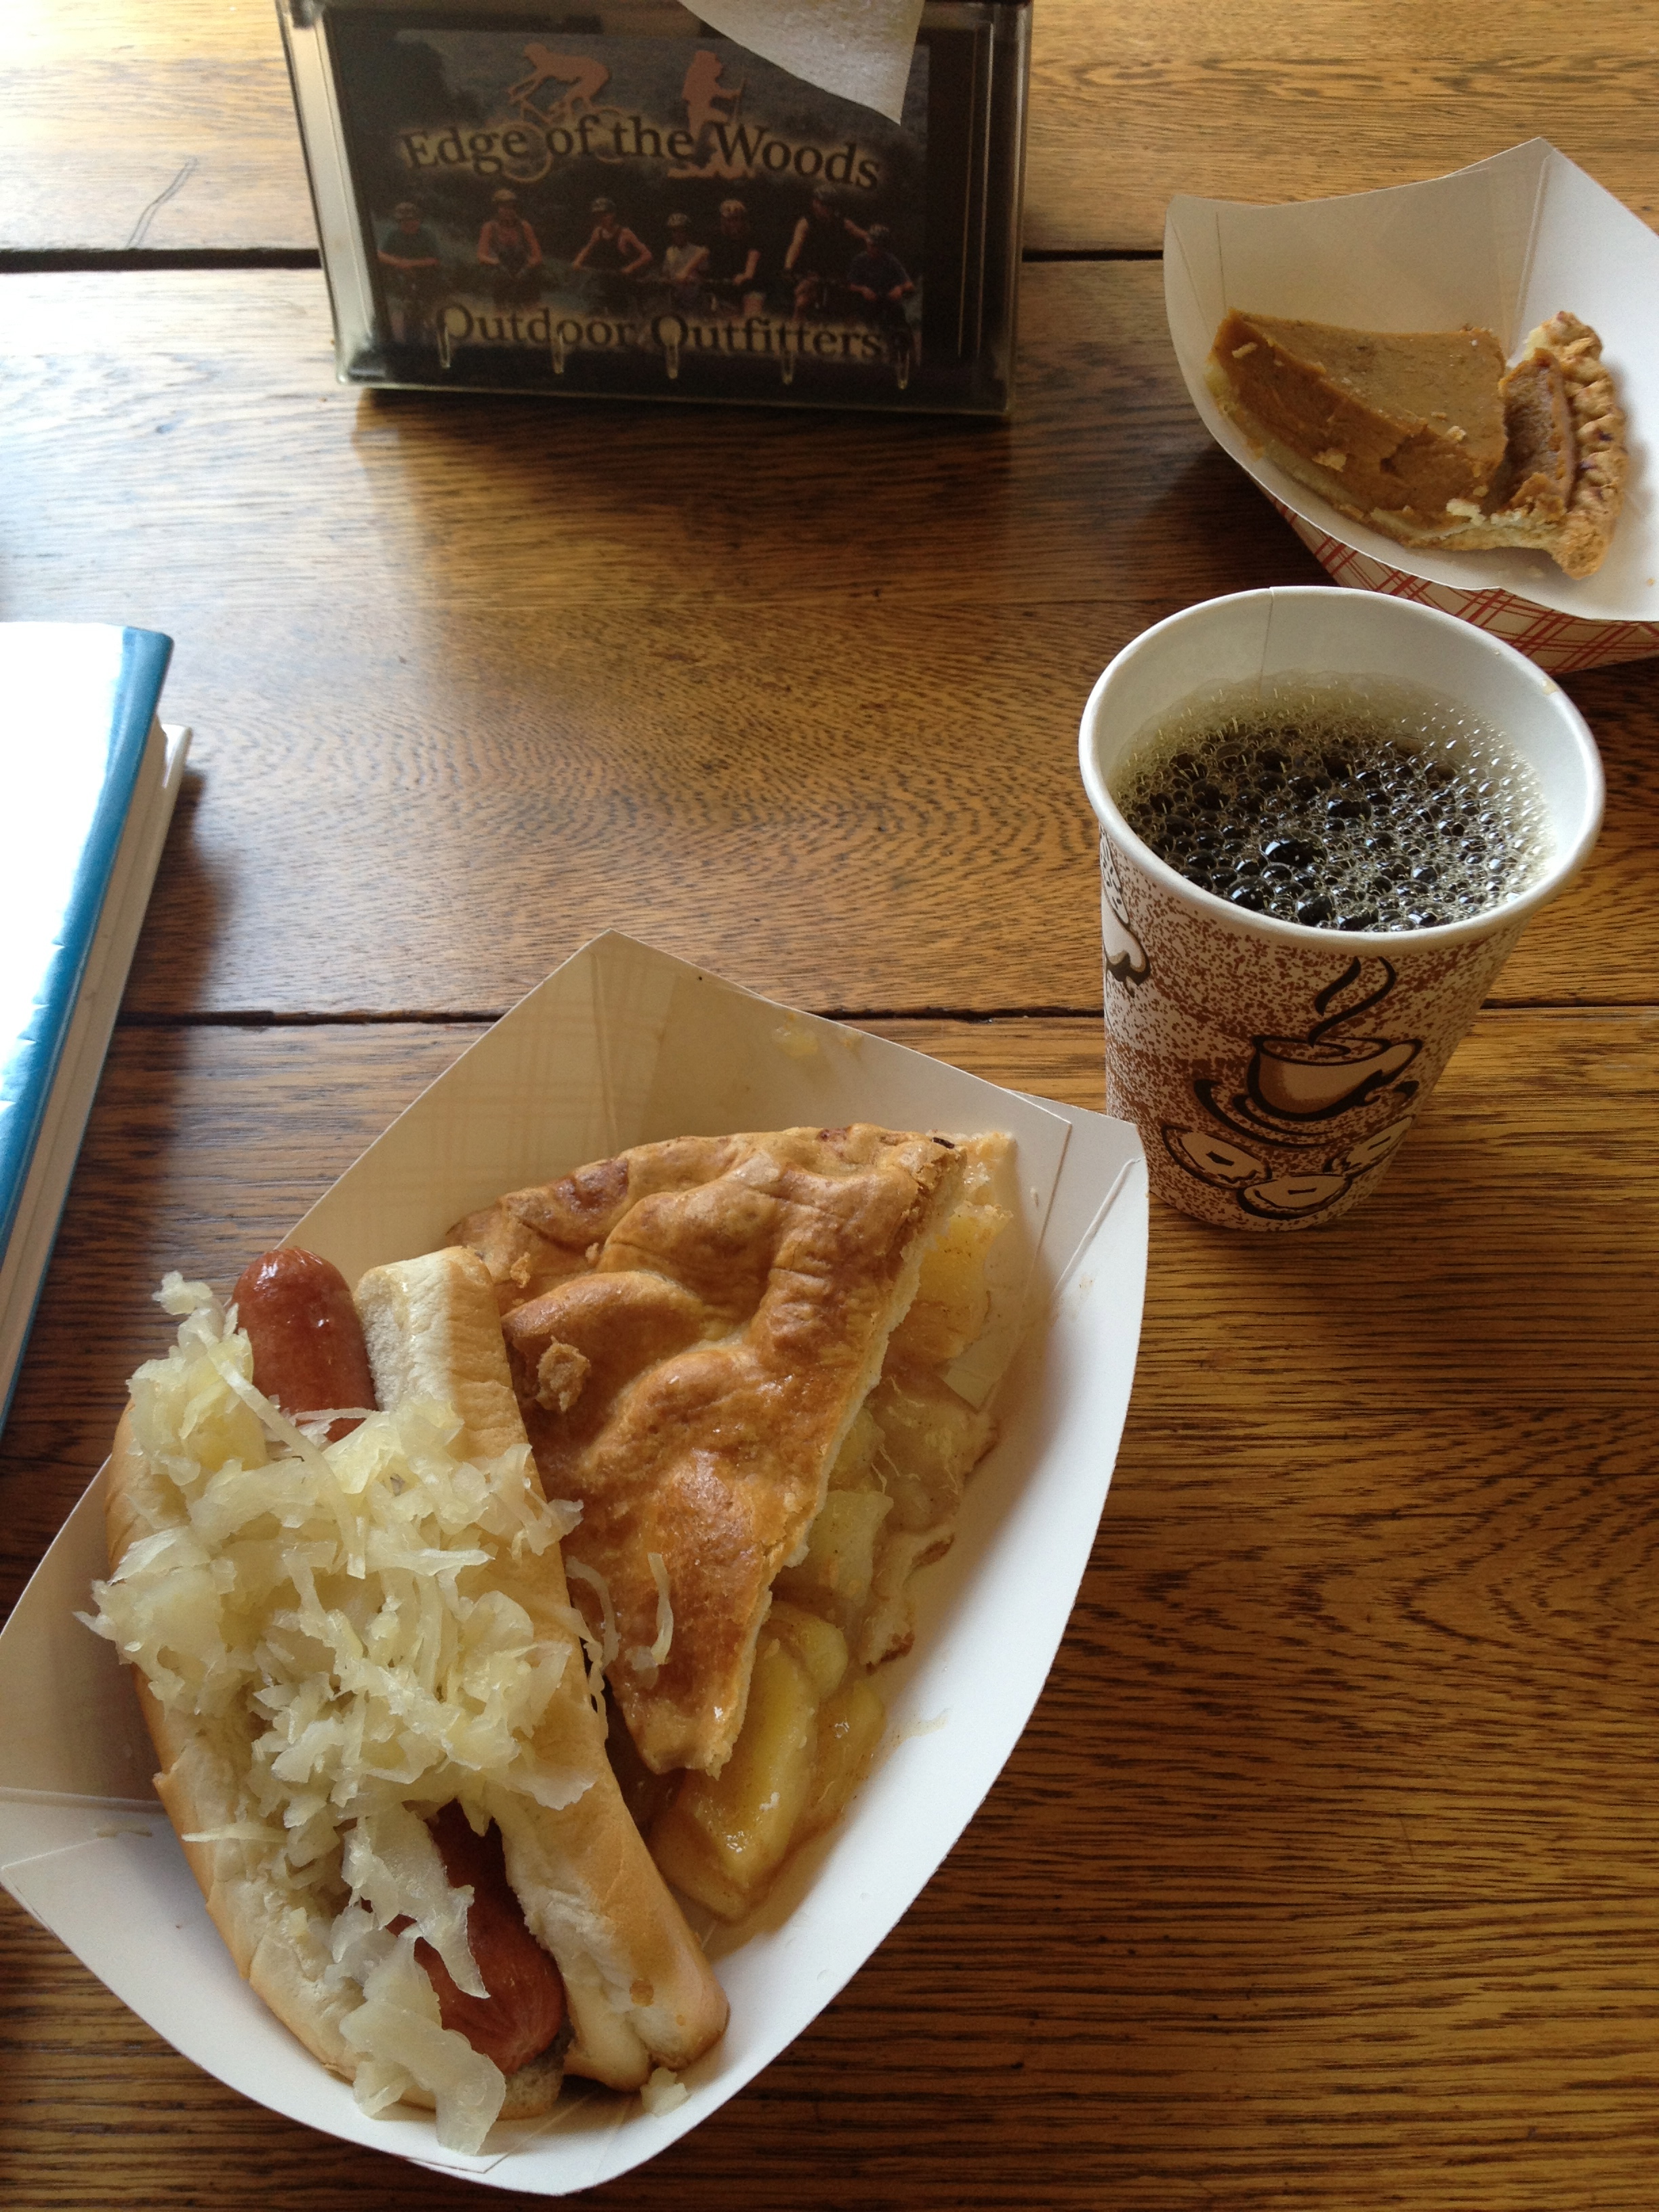
After our hike we drove into the town of Delaware Water Gap, PA to the Village Farmer and Bakery.  I just had to try the famous hot dog and slice of pie called the “True Love!”.  For just $2.49, what’s not to love?!  I thought the pie was pretty good, bearing in mind that all pies pale in comparison to Angie’s homemade pies.  I liked it well enough to buy a small pie to take back to the campground.  The next morning I heated it up on the grill and had it with my morning coffee.  What a breakfast!

True Love!

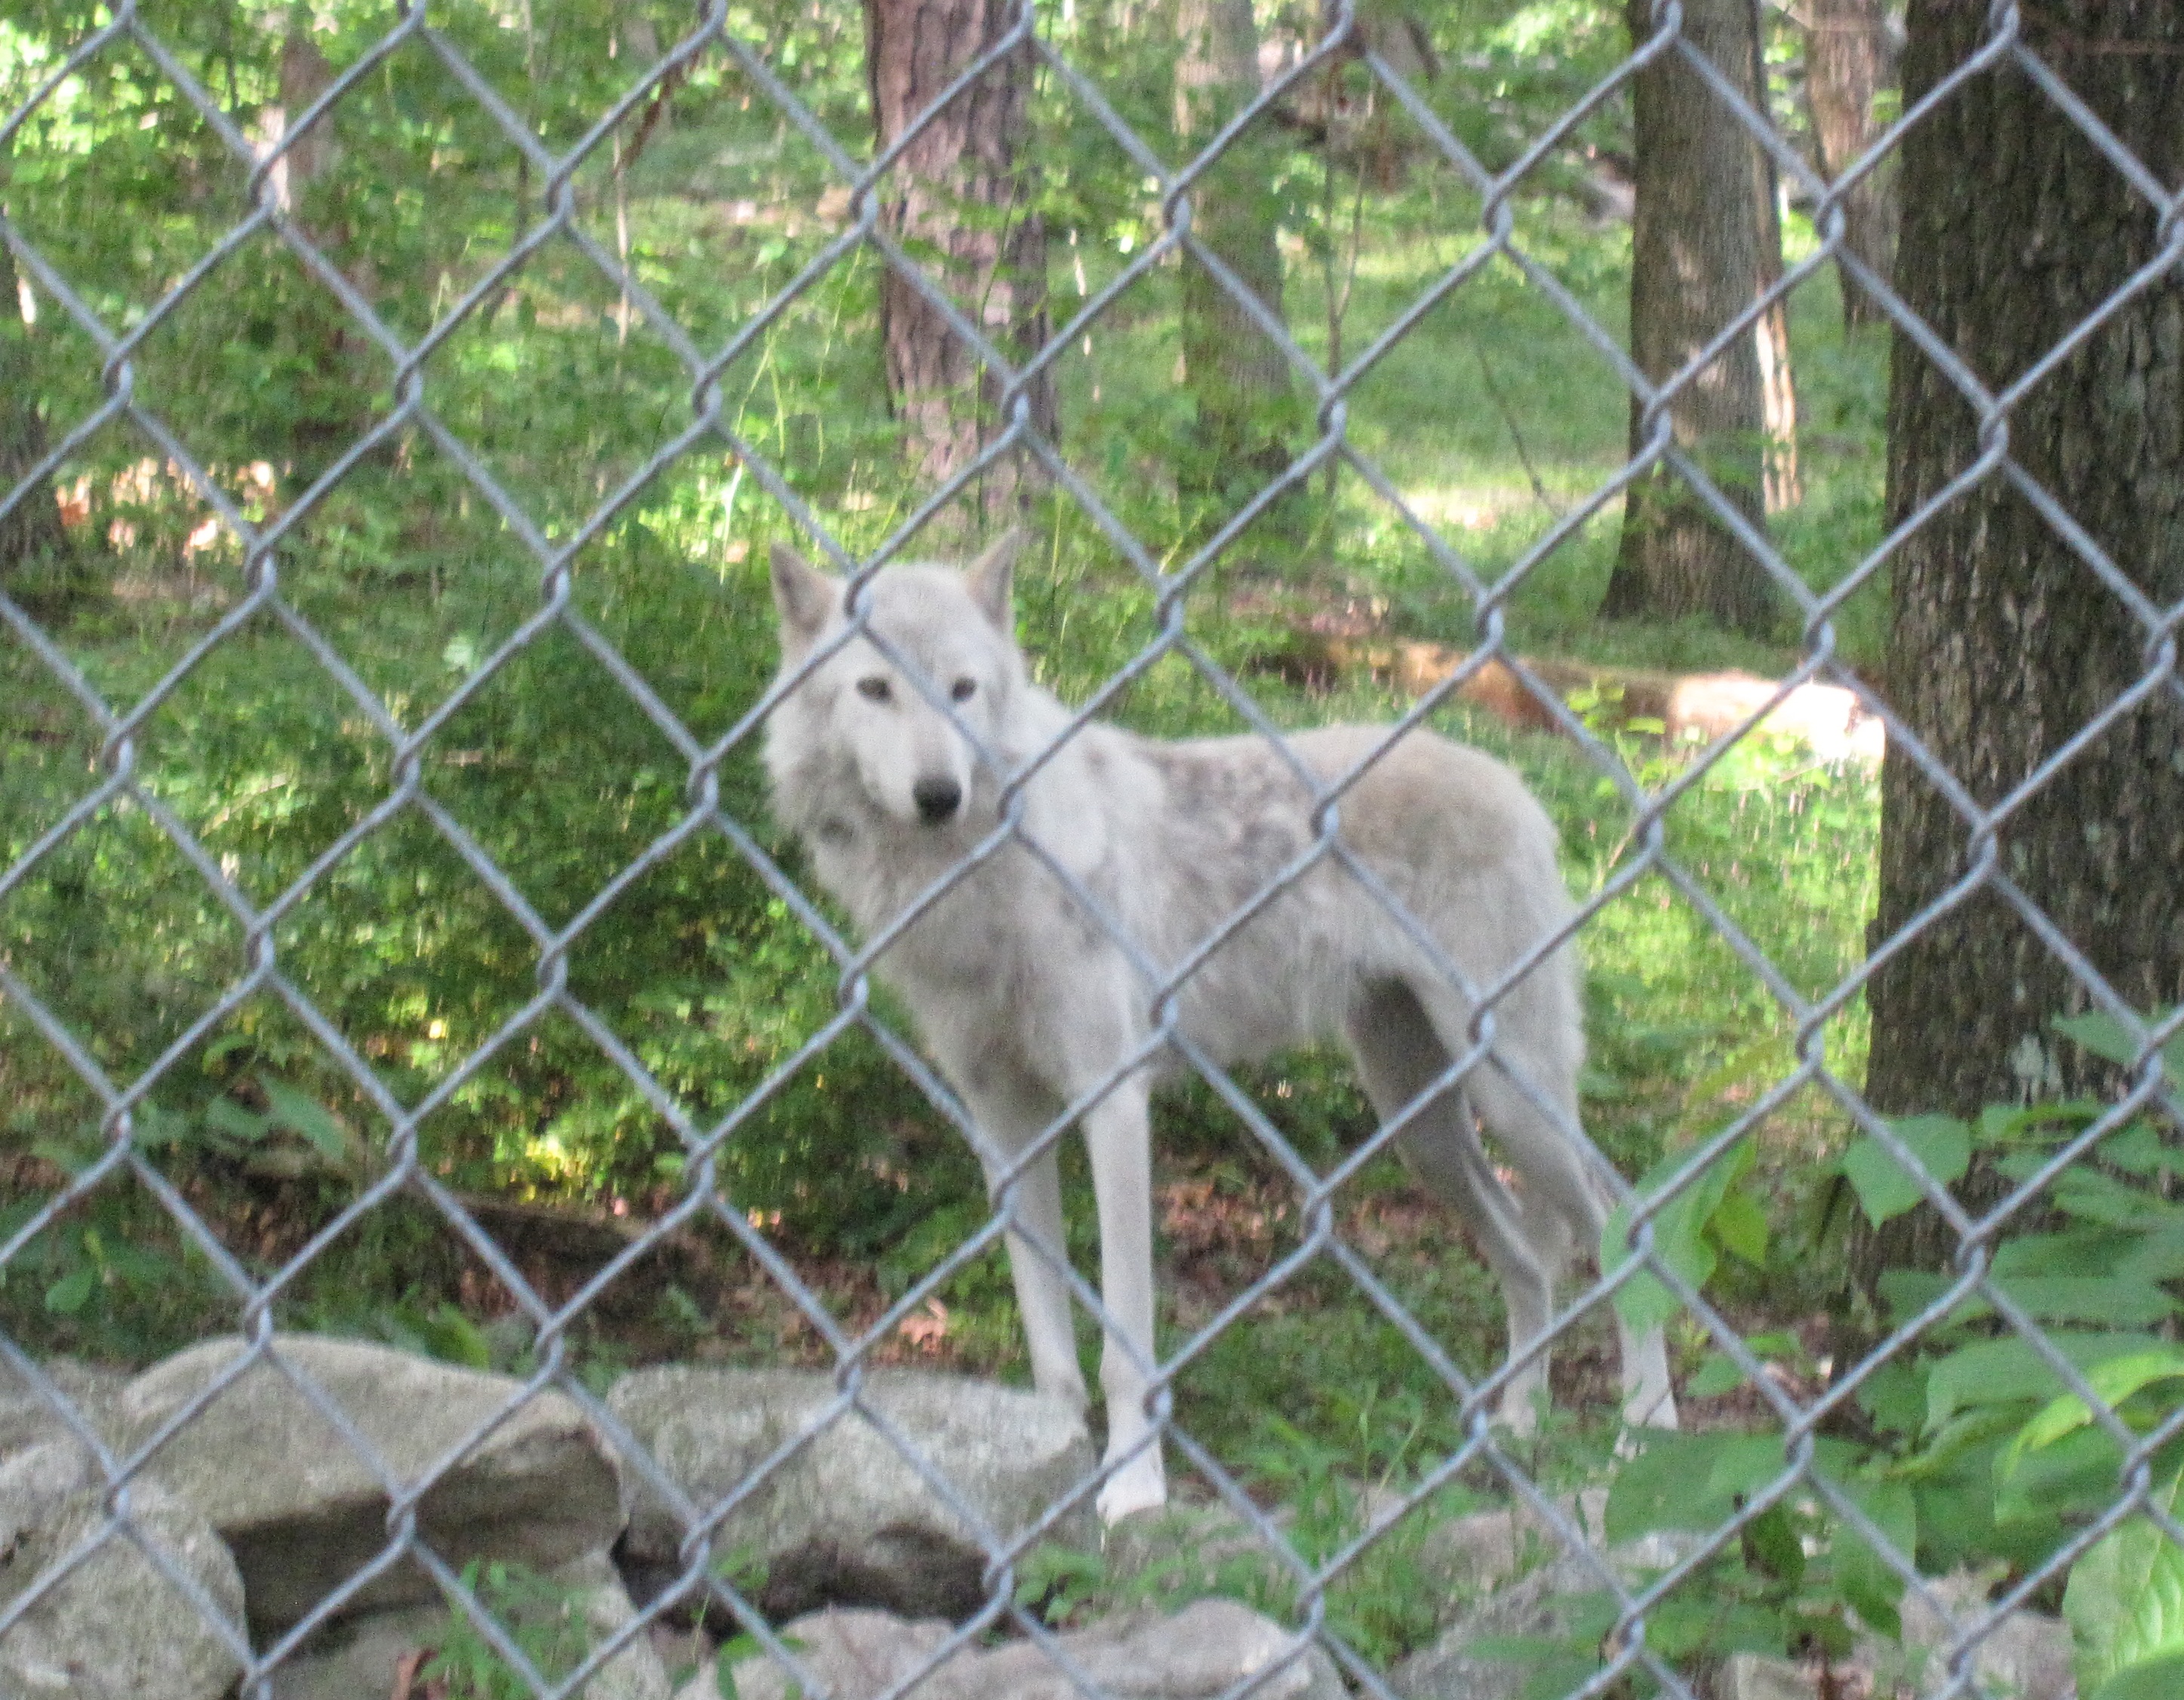
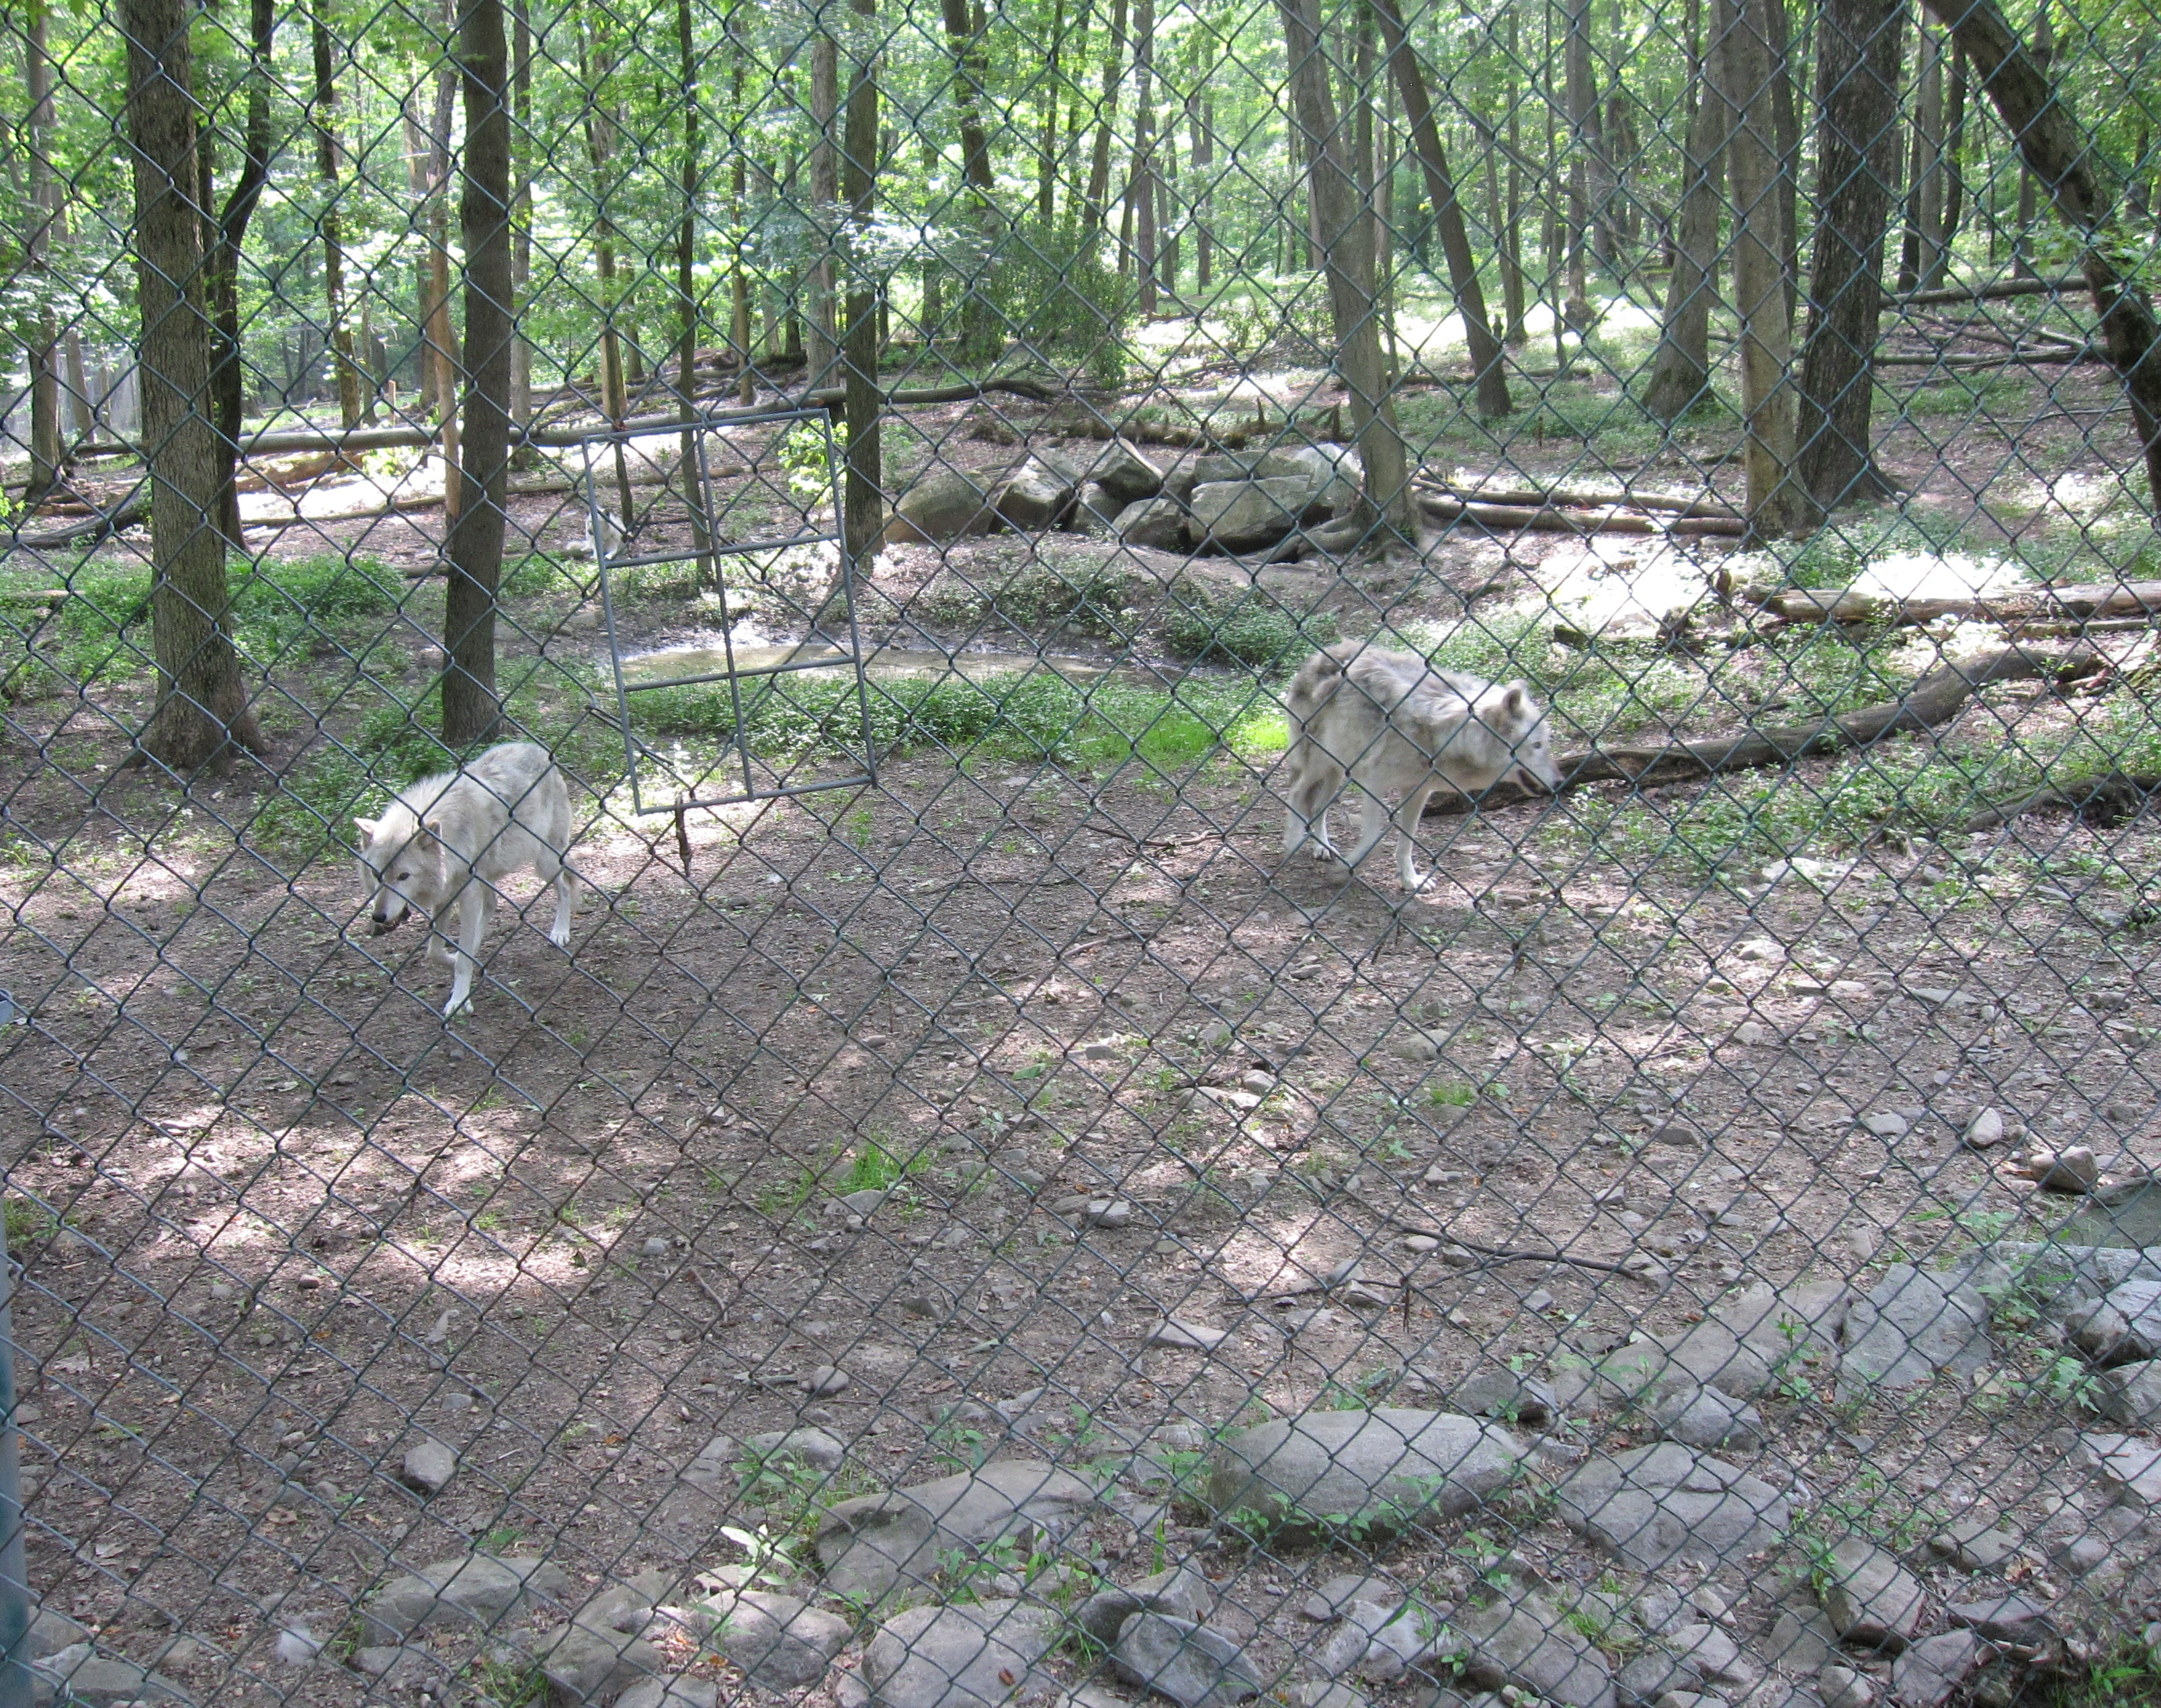
Then it was time to head back to the campground for a tour of the Lakota Wolf Preserve.  The 20 or so wolves are kept in four separate enclosures made of fence about 8′ tall.  The fence is buried and extends inward 3′ underground to keep the wolves from digging under.  Wolves are apparently not climbers, but they are diggers.  Not yet having completely shed their winter coats, the wolves reminded me of long-legged scruffy dogs.  The hosts at the preserve explained their process for raising the pups, introducing them to the packs, and feeding the animals.  We were told that wolves will accept any puppy into the pack, though they will not accept older wolves.  We were also told that wolves are extremely skittish around humans.  We were surprised to learn that there has never been a recorded instance of a wolf attacking a human in the United States.  Wolves want nothing to do with humans!  At the end of the talk the hosts called the wolves together at intersection of the four pens and told the wolves to “howl for their dinner”, which they did.  The howls from six or more wolves joined in a single, soulful note.  It was quite a memorable experience.

Wolf


Wolves

That evening the boys swam in the pond, we had sausages from the grill, sat around the campfire and, being tired from the day’s events, went to bed a little earlier than the night before.

The next morning we ate breakfast and then went for a drive.  Warren county NJ really is beautiful.  It is very similar to the hilly country in southeastern Ohio or wester Pennsylvania that I am more familiar with.  Not what my friends and family from Ohio would imagine when you ask them to picture New Jersey.

On the drive home we stopped by a friend’s house in Port Murray.  She gave us a tour of her historic house, built in 1752.  And I though my house was old!  The property was truly lovely with an excellent spot for drinking coffee, or lemonade, and looking out over the pond.

The drive home was uneventful, except for the screeching and grinding sound of the brakes on our truck.  Ugh!  I guess it’s time to replace those pads, and probably the rotors as well.  It seems I have more work ahead to prepare for our next camping trip.  Stay tuned.

Replacing the Wheels

We made it to Jersey Shore Haven on the rims that I purchased from Champion Tire and the tires that came with the camper.  But I just didn’t like how close the tire was to the lip of the fender.  The gap measured about 1/4 inch.  Heaven forbid that I run over a large bump and that tire rub up against the lip.

Tight Fitting Wheel

Although the tire was close to the fender, there was plenty of clearance between the tire and the shock absorber.

ShockLarge

So I set about finding different rims.  After researching the web I learned that rims can have offsets.  The rims I had had no offset at all.  The center of the rim was exactly in the center of the tire tread.  It looked I needed a rim that set the tire back into the wheel well.  Lucky for me, it looked like Vintage Trailer supply had just the rim I needed.  I ordered two 15 inch rims with a 1/2 inch offset.  The folks at Champion Tire helped me find tires with a small enough profile to fit in the wheel well.  I went with Nexen 165/80R15 tires.  They are car tires, not trailer tires, but that’s the type of tire that came on the trailer when I bought it so I figured that would be fine.  I brought the tires home and held my breathe when mounting them hoping that they would fit.

New Rims and Tires

Voila!  The new rims and tires fit beautifully.  And the half moon hub caps look great too!

Installing the New Axle

A couple of good friends had already helped me to remove the old axle.  There are only six bolts that hold it on:  2 on each mounting bracket and 1 for each shock absorber.  Those bolts were rusty!  It took lots of PB-Blast lubricant, a couple of impact guns, and some muscle to get it off.  The trailer has been resting on cinder blocks in my driveway since then.  I’m sure my neighbors love that site.  Yes, I’m that guy.  The one with his car/trailer up on blocks performing repairs.

A couple more weeks went by and I still hadn’t received the axle.  After a few calls to Colin and Axis Products I finally tracked it down.  It was scheduled for delivery the day before we were scheduled to go on our first camping trip!  The shipping company agreed to let me come pick it up as soon as it arrived at the depot.  Here it is in the back of the truck.

The New Axle

Lucky for me, a friend agreed to leave work early to come help me.  We jacked the axle up under the trailer to see if the dimensions were right.  Phew, it fit nearly perfectly against the existing mounting plates.  The bolt holes on the new axle did not align with the existing bolt holes on the mounting plates.  I was told to expect this and was ready to drill new holes with the appropriately sized bit.

Help from a Good Friend

With the axle in place we drilled one hole through both the mounting plate on the trailer and the mounting bracket on the axle (bolt on the right in the picture below).  For the second hole we tried to use a hole that already existed in the mounting bracket, but had to drill from the blind side of the mounting plate on the trailer to make the hole go all the way through (bold on the left).  In hindsight, this was a mistake.  It was impossible to align the holes by drilling from the blind side.  We came close, but it wasn’t close enough for the bold to go through.  So we had to run the drill bit back and forth in an effort to ream the hole to make it big enough for the bolt to go through.  This took quite a bit of time and effort.  If I did this again, I would make sure to drill the hole straight through in one shot.  That way I would know that the holes would align.

Mounting Bolts

After what seemed like hours of drilling, we finally managed to put the bolts through.  Tightening the bolts was another chore.  One of the bolts wasn’t too bad because we could reach it with our impact wrench.  The other required persuasion with a big crescent wrench and a breaker bar.  I’m starting to break a sweat just thinking of how hot it was that day.  And my friend volunteered for this! We finally had the axle on by around 4:30 PM.  I was relieved that we would have a little time that evening to pack for our trip the next morning.  But, hold on.  When we went to put the wheels on, they didn’t fit.  Arrrrrrgghhhh!  The bolt pattern was correct, but the hole in the middle that the dust cap comes through was too small.  So began the frantic hunt for rims that would fit.

We rushed to Tractor Supply and found some trailer rims that looked like they would fit.  We brought them home and found that the rim did fit, but that the tire that came on the rim was too big.  By that time it was too late to find any other rims.  I would have to wait until the morning to continue the search.

The next morning I went to Champion Tire, in Ringoes NJ.  The folks at Champion saved our vacation.  They sold me rims identical to the ones I got from Tractor Supply, but were able to put my old, smaller tires on them.  This time the rim and the tire fit.  It was a tight fit (more about that in another post), but good enough to get us on our way.

We lost a day of our vacation, but we were still able to go.  Without the help of good friends and the folks at Champion Tire, our vacation would have been ruined.  I am grateful for all their help.

Replacing Windows and Sealing Leaks

So, what should I do while waiting for the axle to arrive?  I decided to replace some cloudy old plexiglass windows and seal some leaks.

One of the previous owners of the trailer decided to replace both the front and rear windows with plexiglass.  Given that this trailer does not have a rock guard over the front window, I can understand why he decided to use plexiglass.  But, now many years later, the plexiglass had become opaque, had warped, and the tape and caulk holding the windows into their frames was coming loose.  I decided to replace them with tempered glass so that they would be stronger than regular glass and so that if they did break for some reason, there would be less risk of injury.  I measured the size of the windows and ordered the tempered glass from my local window shop.  I also ordered butyl tape and plastic window glazing from Vintage Trailer Supply.  And I ordered Acryl-R sealant from Airstream.  When all the supplies came in, we were ready to perform the replacements.

To remove the window you simply remove the arm that allows you to roll the window in and out and then remove a single screw that hold the window frame in its guide track.  Once removed we either pulled out the plexiglass or broke the existing window to remove it.  Then we spent considerable time removing the sticky caulk that the previous owner had used to seal the window.  Once removed we placed the butyl tape in the recess which holds the glass, laid the glass in place over the butyle tape, and then installed the plastic window glazing to hold the window in place and shed water.

Here is a picture of the window replacement pro installing the new tempered glass.

Window Replacement

Once the glass was installed we slid the frame back into the track, locked it in place with the screw, reinstalled the extension arm, and then sealed all around the window frame with Sikaflex 441 in the large gaps and Acryl-R in the small gaps and seams.

Oh it looks soooo much better.  Now we can see through the front window, through the trailer, all the way through the rear window.  I can see anyone who might be tail-gaiting.

 IMG_0483

Now, how much longer until that axle arrives? …

Does it Need a New Axle?

As I read through the Airstream Forums, I came across stories of axle failures.  It turns out that there is a well known problem with the axles originally equipped on Airstreams from the early 1960’s.  The shape of the spindle on which the bearings (and the wheel) spin makes it susceptible to weakening over many years of wear.  In this weakened state the spindle can break in two causing the wheel to break free.  Imagine your wheel suddenly no longer connected to the axle.  Imagine the damage the wheel could cause to the wheel well.  Imagine even worse damage that could result, especially on a trailer that has only one axle.  If you need help imagining how bad this could be, then read this description of a 1965 Caravel that lost its wheels while driving down the highway.

I was sure that the axle on our trailer had never been replaced.  But did it really need to be replaced?  How could I tell?  I found many suggestions for determining whether or not a torsion axle should be replaced including:

  1. Have someone ride in the trailer while you are towing it (note: this is illegal).  Have them tell you how rough the ride is.

  2. Look for fasteners working loose inside the trailer.  This is typically caused by the trailer riding rough.

  3. Look at the angle of the trailing arm from horizontal.  How many degrees toward the ground is it pointing.  When you jack up the trailer, does the angle of the trailing arm change or is it frozen.

Ultimately I was convinced to replace the axle when someone told me, “The axle on your trailer has a well known reputation for catastrophic failure.  Don’t waste time inspecting it.  Just replace it ASAP!”

Now where was I supposed to get an axle and how was I supposed to install it?  I don’t have a shop to work in.  Any work that I do myself will need to be done in my gravel driveway.  I found that there are basically two manufacturers of the kind of axle I needed:  Dexter and Axis.  When you order an axle from the manufacturer you need to supply all kinds of measurements to ensure that the axle will fit your trailer properly.  I didn’t feel confident about supplying those measurements myself, so I looked for someone who could do it for me and guarantee that the axle would be ready to install when I received it.  I contacted three different sources for help.  I first contacted the folks at Inland RV.  At the time they told me that while they could order an axle for me, I would need to weld the shock mounting brackets on myself.  They recommended that I speak with someone at the Airstream dealership in Los Angeles.  I made that phone call and collected information about the axle that I could get via that route.  Through Airforums.com I was also referred to Colin Hyde Trailer Restorations.  Colin is well known in the Airstream community as the regular expert guest on the Vintage Airstream Podcast.

Finally I decided to purchase an Axis axle through Colin.  From the time I placed the order with Colin I had a about two months in which to remove the old axle and install the new one before going on our first camping trip.  Let the countdown begin.

Closer Inspection

After we towed the camper home it was time for a closer inspection.  Not surprisingly I uncovered several issues.  The first things I looked at were the plumbing, the electric, and the appliances.  After connecting the camper to an electrical outlet we found that the lights worked.  Unfortunately, that’s about all that worked.  Although the previous owner had bragged about the fact that he had installed new PVC plumbing, I found one of the pipes broken and the electric hot water heater that he had installed rusted beyond repair.  I was reluctant to turn on the gas to test the stove, but I did try to test the water pump and the refrigerator.  Neither worked.  It seems I had purchased the equivalent of an aluminum tent on wheels.  Clearly I had work to do.

But before addressing any of the internal systems issues I decided to do some research on the Airforums.com website.  The Air Forums discussion boards are an invaluable resource for any vintage airstream owner.  Nearly every topic you can imagine has been discussed somewhere within those forums.  Through the forums I quickly began to learn that there exists an entire community of Airstreamers who are passionate about the history, care, and use of their trailers.  Members of that community stand ready to assist newcomers with any questions they may have.

After reading through the forums and consulting other websites I quickly learned that the internal systems generally do not deserve the highest ranking when prioritizing vintage trailer issues that need to be addressed.  My reading suggested that the highest priorities should be:

  1. Make sure that the axle is good

  2. Make sure the frame is good

  3. Make sure that the towing lights work properly

  4. Replace rotted floor if it is significantly affecting the structural integrity of the trailer

  5. Stop the leaks

In other words, you first need to make sure that the trailer doesn’t fall apart when you are towing it down the road.  Everything after that are just luxury items.


Purchasing our Bambi II

One evening about a year ago my mother called from Florida to tell us that she saw an Airstream camper in her neighborhood.  She asked if we were interested in buying it.  My wife, Angie, had mentioned that she would like to upgrade from tent camping to trailer camping.  Angie had shown her pictures of old Scotty campers, small teardrop trailers, and Airstreams.  Little did we know that not long after expressing our interest my mother, the expert shopper, would find a small Airstream for sale.

I didn’t return her call right away.  Angie and I talked about it that evening and then went to sleep on it.  Mom called the next day and said, “Well, do you want this thing or not?!”  Never having owned a pull-behind camper I asked a lot of questions.  She had a friend take a few pictures with her phone and send them to us.  My stepfather gave me a fairly detailed description.  He summarized the trailer’s condition by saying, “It looks like it’s in good shape.  It’s not a new trailer.  It’s old and it looks old, but in good shape.”  It was a 1964 Airstream Bambi II.  It had only a couple of minor dents in the body, had been lightly used over the past few years, and it was road worthy.

Curb side view

I called the owner and asked more questions.  He told me some of the trailer’s history.  It was built in Airstream’s factory in California, which has since closed though the factory in Ohio continues to make trailers to this day.  It was one of only around two hundred Bambi II’s made.  It spent many years in North Dakota.  The current owner had been in possession for 4 or 5 years.  He had done some work on the interior.  He covered the floor with Pergo hardwood, replaced some of the original copper plumbing with PVC, reupholstered the gauchos, and hung blinds.  When he told me that he would haul the trailer to me in New Jersey for the price I had in mind, the deal was sealed.  We were going to be the proud new owners of a Bambi II.  We sent him a deposit and waited for his trip north.

Street Side View

A few months later he pulled the trailer to Scranton PA where we went to pick it up.  We had bought a used Chevy Blazer in the meantime and had a hitch installed to pull the trailer.  We pulled it home to New Jersey without any problems.  Once we got it home it was time to start learning what I had gotten myself into!