Roof Vent Cover Repairs

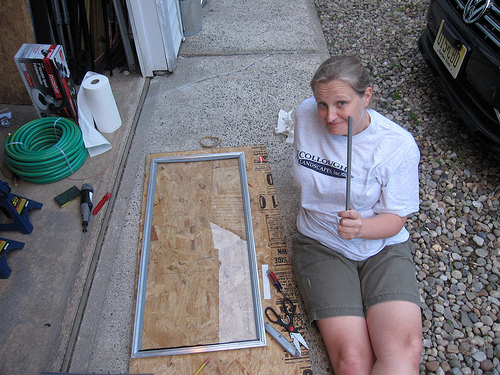
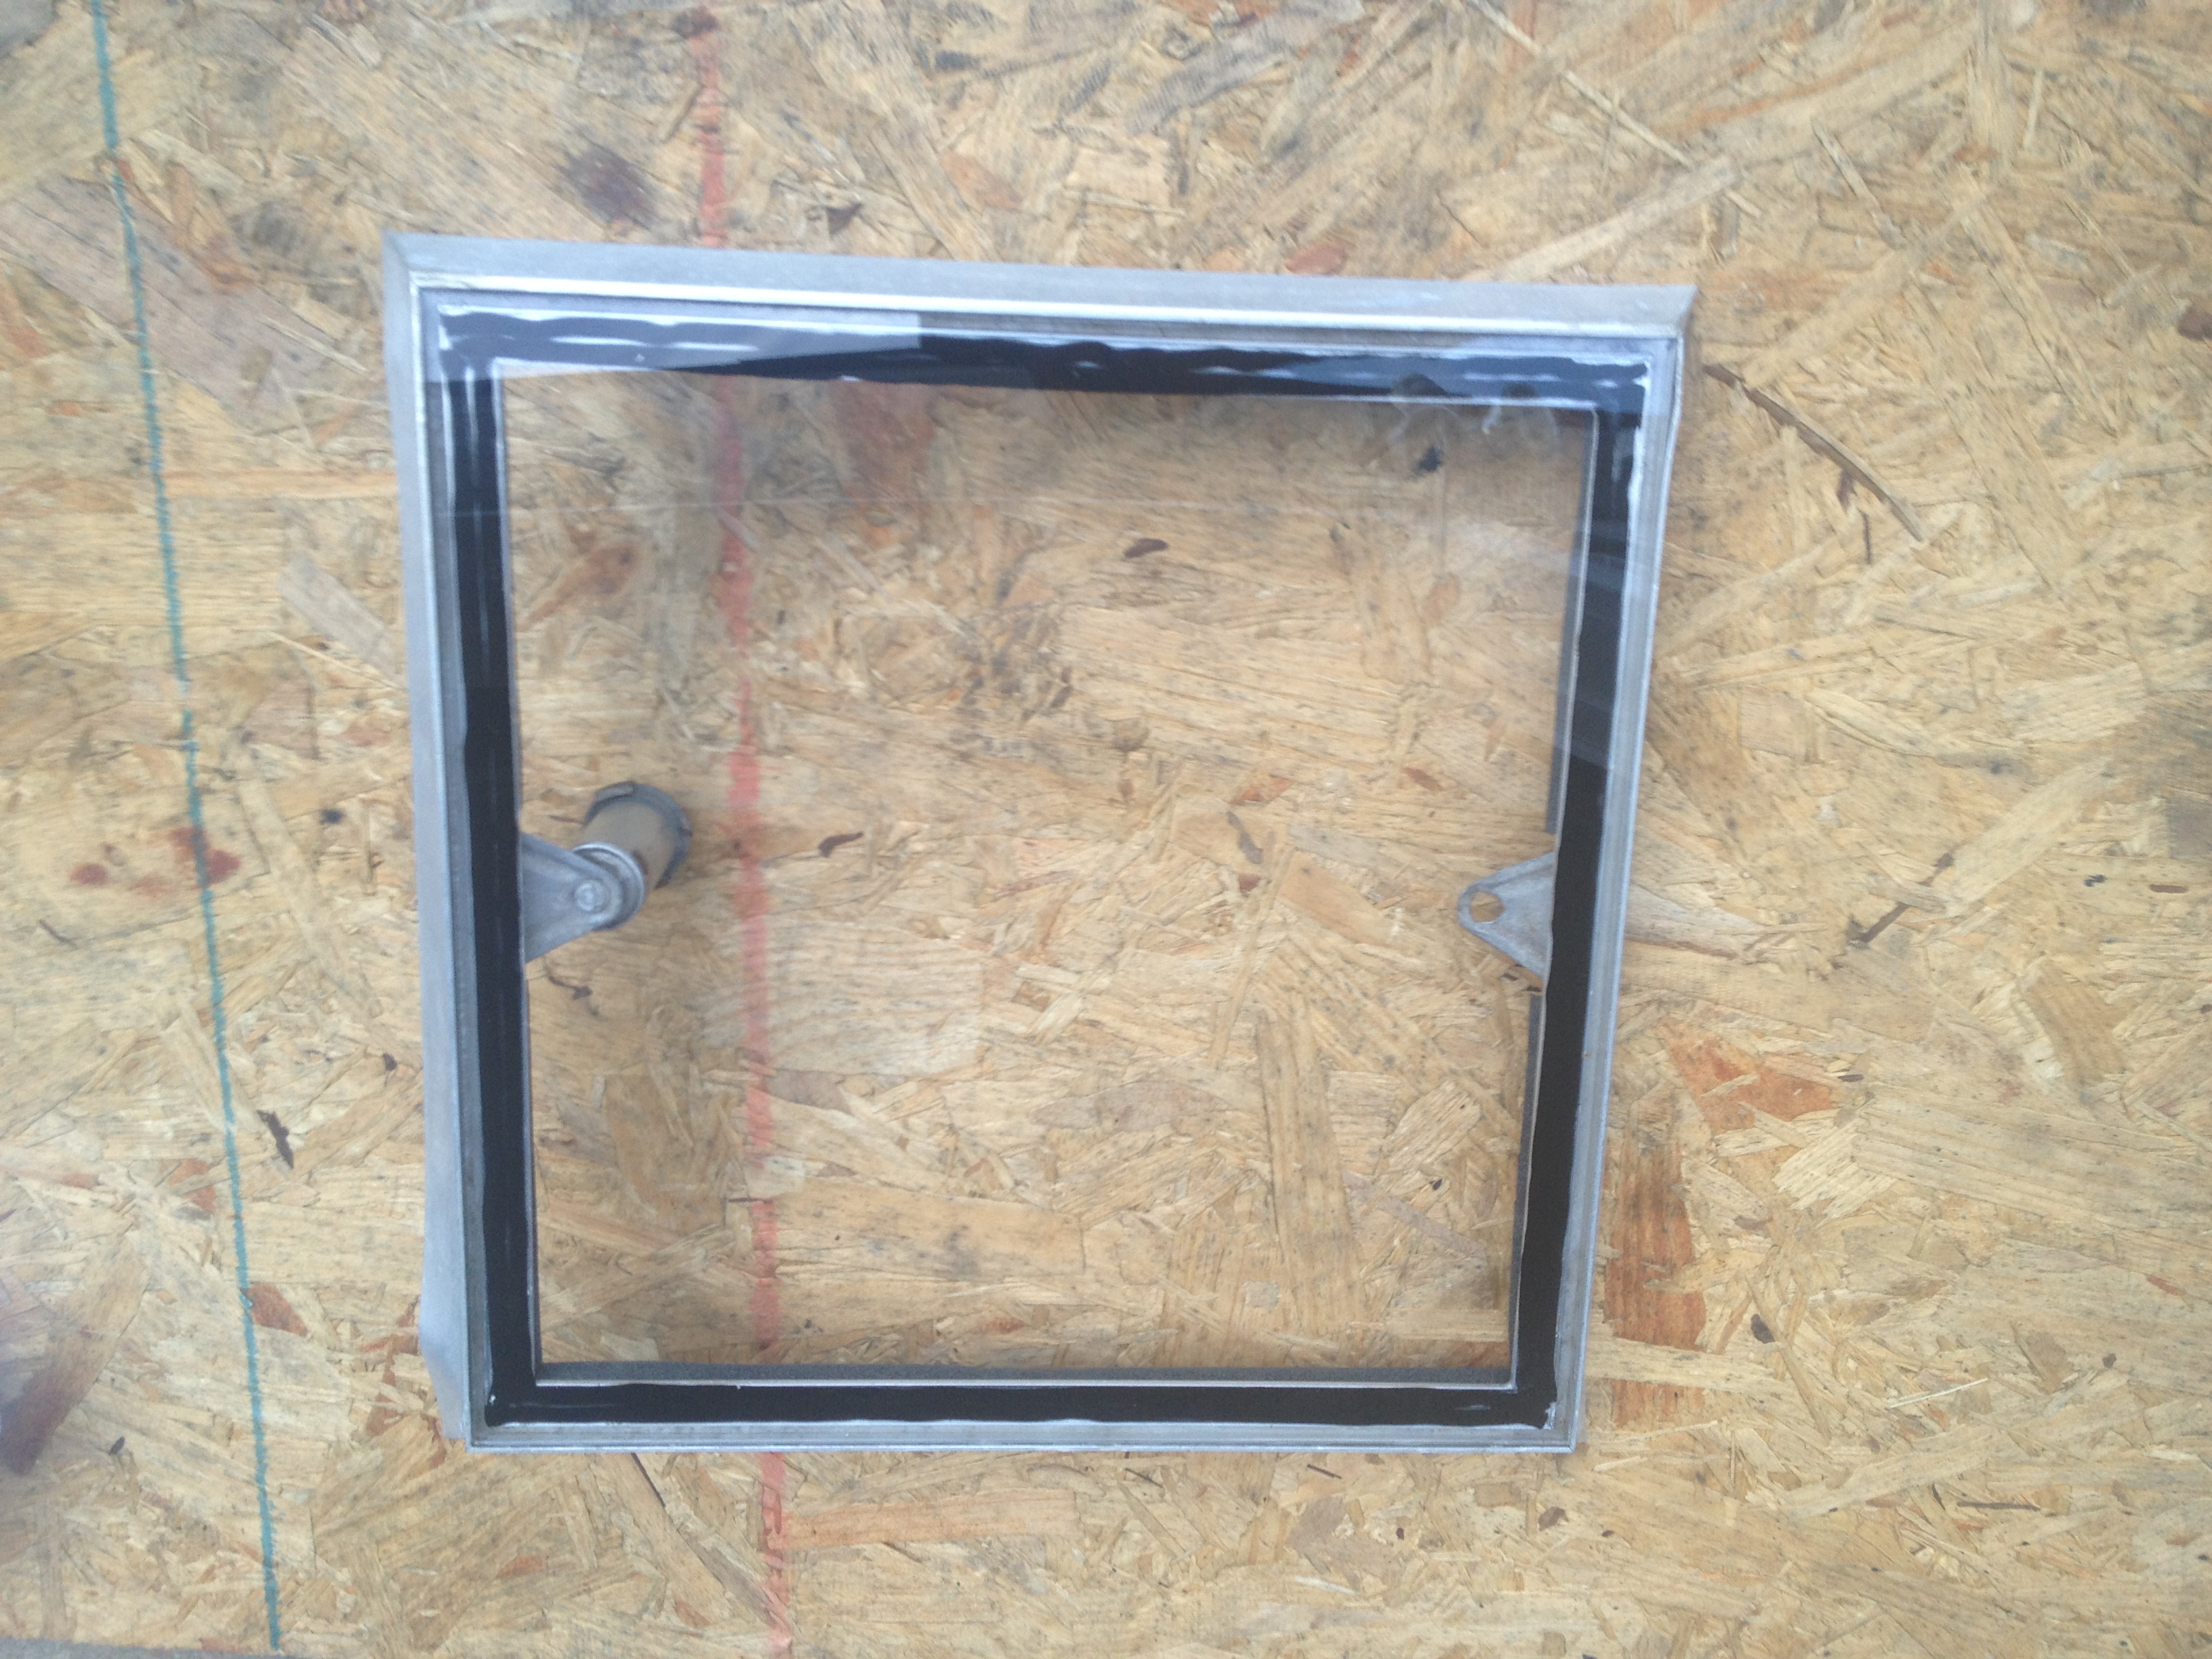
After returning from our trip to Don Laine Campground I removed the roof vent cover and took a closer look.  Here is a picture showing the frame with the plexiglass missing.  Only one of the crank/lifters remains (circled on left).  The other fell off last year while we were driving down the road.  If you click on the image to view the higher resolution version of the image below you’ll see where a previous owner glued foam around the perimeter of the frame.  If you look very closely you’ll see the thin line of clear silicone around the outer edge as well.  That silicone was the only thing holding the plexiglass in place.  When the wind got underneath, of course the plexiglass flew right out.

RoofVent2


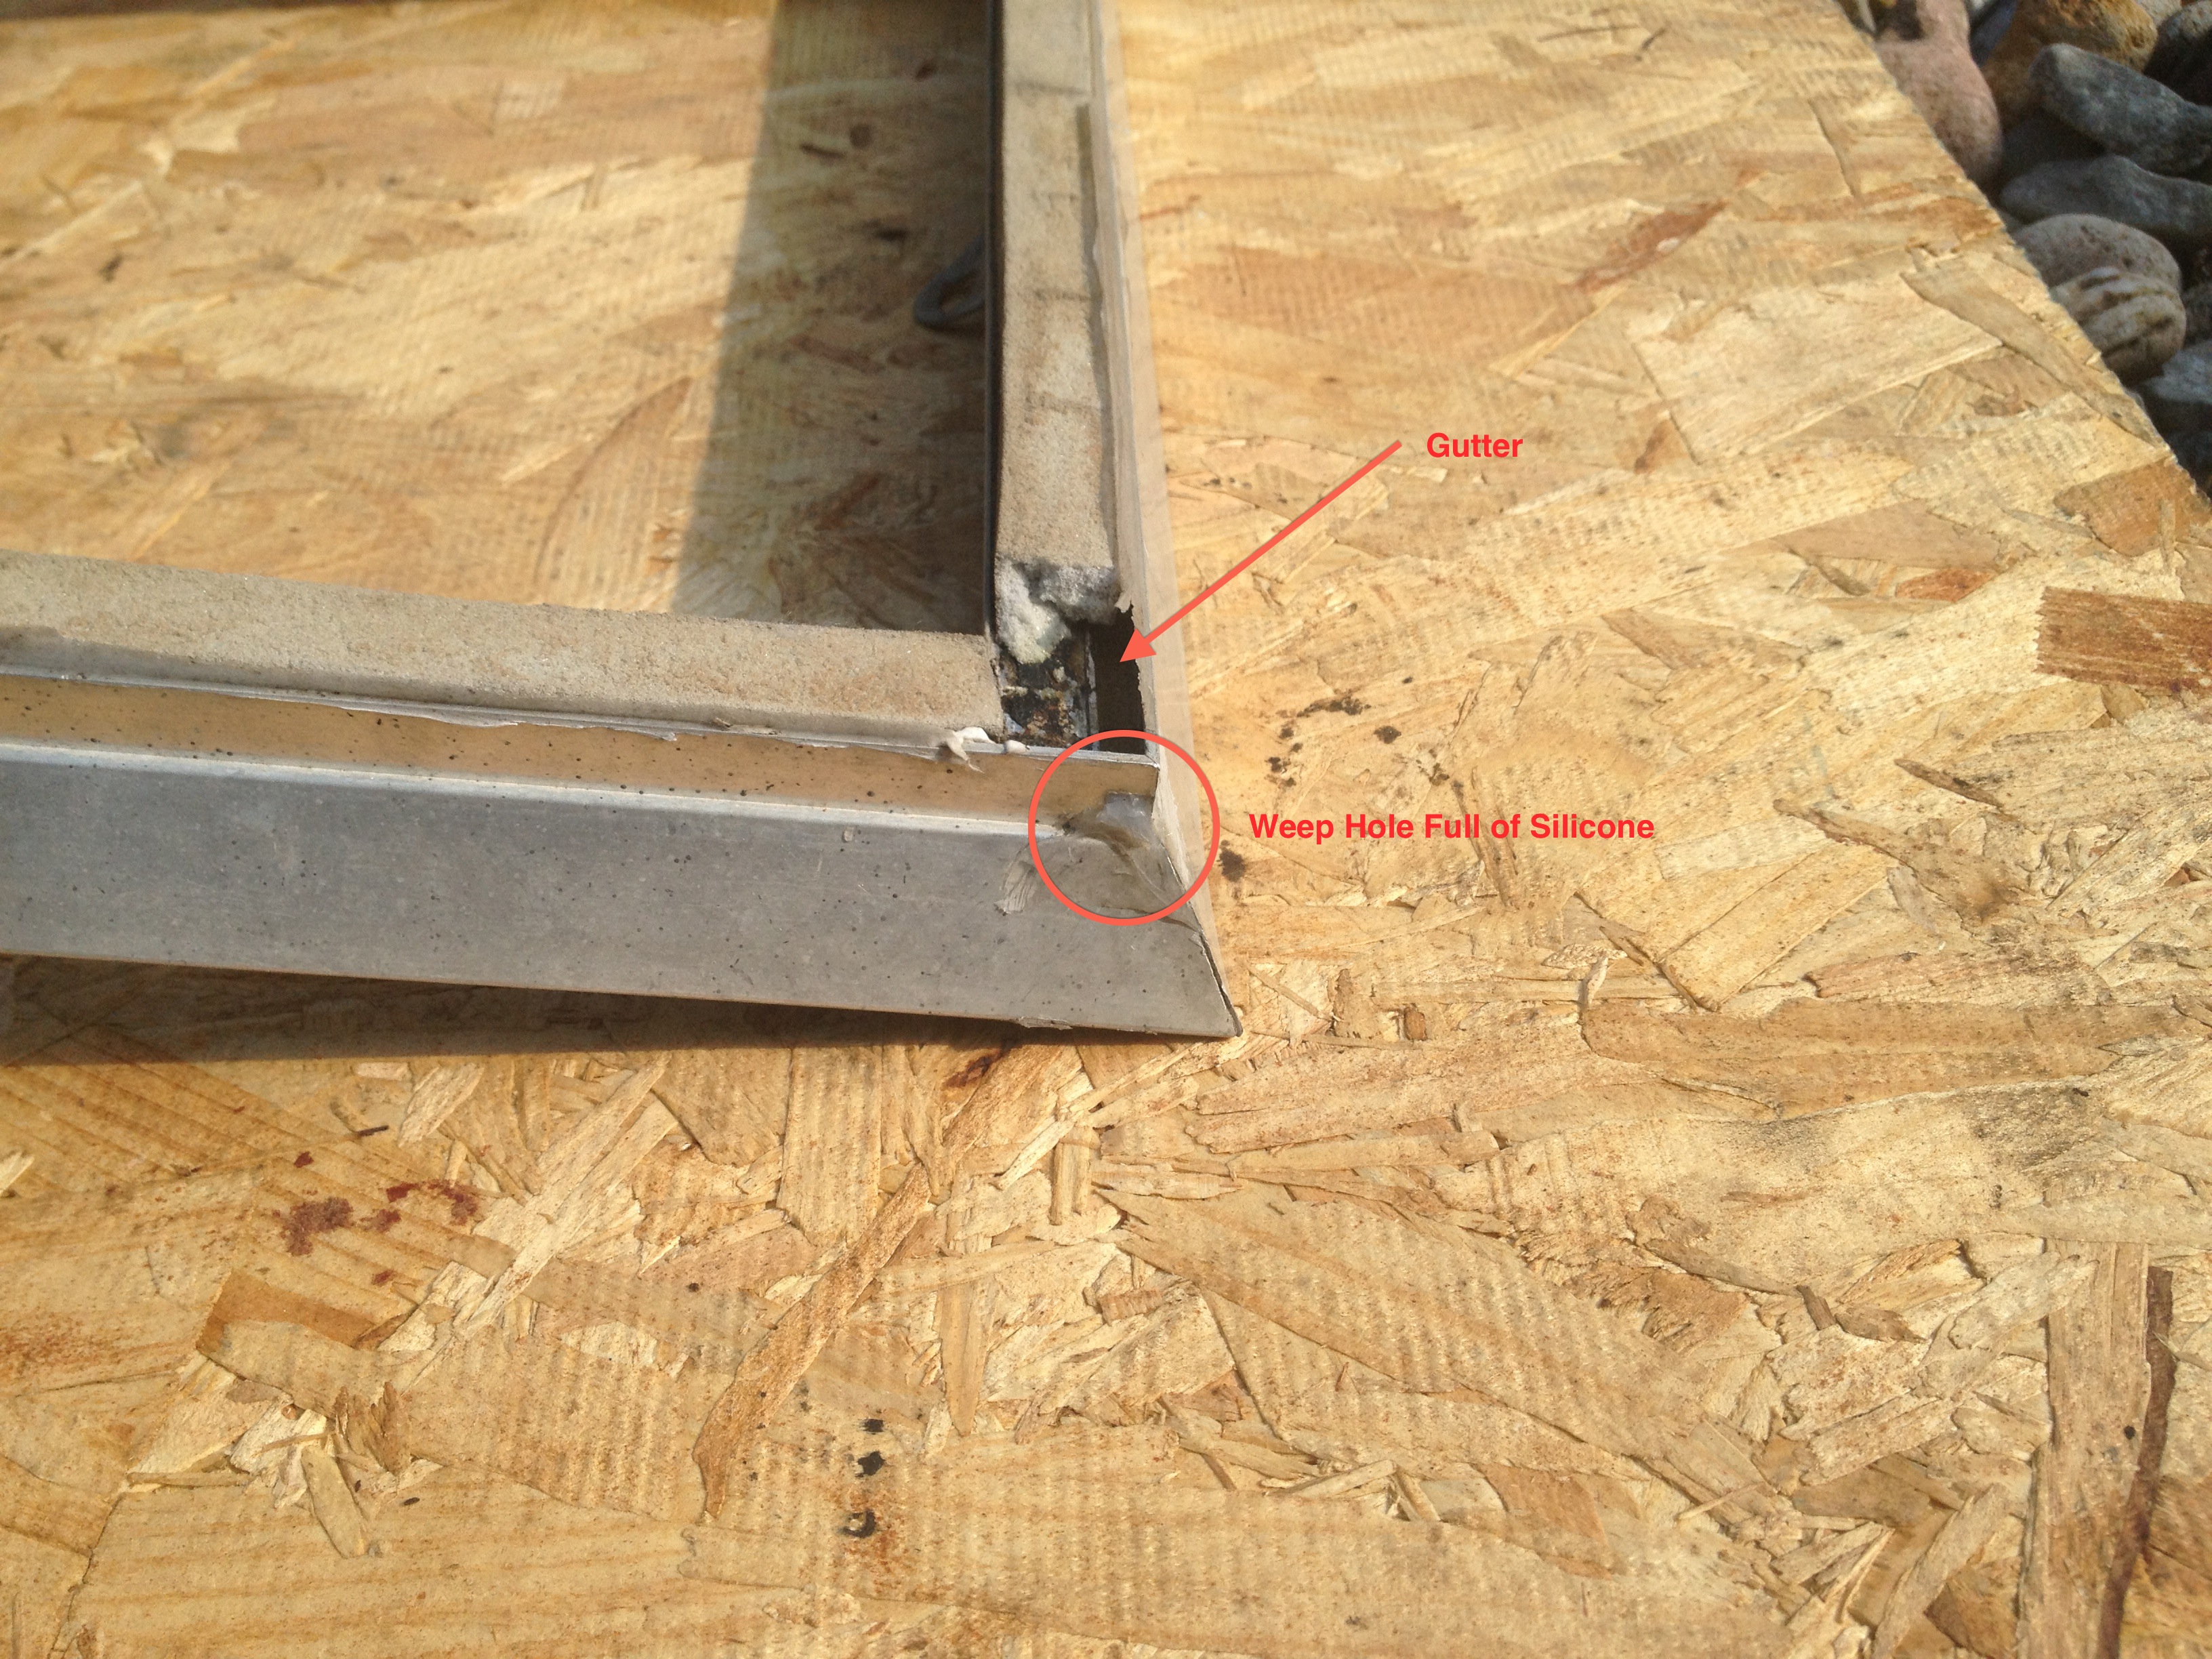
As I spent a few minutes trying to figure out how to secure a new piece of plexiglass into the frame I realized that that foam shouldn’t be there!  I could replace the foam with butyl tape (left over from my previous window replacement work) which would adhere the plexiglass to the frame.  After I pulled back the foam I realized that I would not need to seal around the perimeter of the glass with silicone, as a previous owner had, because there is a gutter underneath that would catch the little bit of water that might seep between the edge of the frame and the glass.  But then I saw that a previous owner had blocked the weep holes that would allow the gutter to drain.  Argh!

RoofVent4


I spent a couple of hours removing all of the foam, glue, and silicone.  Once it was all cleaned up I laid down some black butyl tape and then pressed the new plexiglass into place.

RoofVent5


Shortly after reinstalling the vent cover, it rained.  I’m happy to say that not a drop of water dripped into the camper.  I used wire to fasten the cover to the vent opening.  That should keep the wind from blowing it off.  In the meantime I’ll try to find a replacement crank/lifter so that we can actually open the vent when needed.

Replacing the Wheels

We made it to Jersey Shore Haven on the rims that I purchased from Champion Tire and the tires that came with the camper.  But I just didn’t like how close the tire was to the lip of the fender.  The gap measured about 1/4 inch.  Heaven forbid that I run over a large bump and that tire rub up against the lip.

Tight Fitting Wheel

Although the tire was close to the fender, there was plenty of clearance between the tire and the shock absorber.

ShockLarge

So I set about finding different rims.  After researching the web I learned that rims can have offsets.  The rims I had had no offset at all.  The center of the rim was exactly in the center of the tire tread.  It looked I needed a rim that set the tire back into the wheel well.  Lucky for me, it looked like Vintage Trailer supply had just the rim I needed.  I ordered two 15 inch rims with a 1/2 inch offset.  The folks at Champion Tire helped me find tires with a small enough profile to fit in the wheel well.  I went with Nexen 165/80R15 tires.  They are car tires, not trailer tires, but that’s the type of tire that came on the trailer when I bought it so I figured that would be fine.  I brought the tires home and held my breathe when mounting them hoping that they would fit.

New Rims and Tires

Voila!  The new rims and tires fit beautifully.  And the half moon hub caps look great too!

Installing the New Axle

A couple of good friends had already helped me to remove the old axle.  There are only six bolts that hold it on:  2 on each mounting bracket and 1 for each shock absorber.  Those bolts were rusty!  It took lots of PB-Blast lubricant, a couple of impact guns, and some muscle to get it off.  The trailer has been resting on cinder blocks in my driveway since then.  I’m sure my neighbors love that site.  Yes, I’m that guy.  The one with his car/trailer up on blocks performing repairs.

A couple more weeks went by and I still hadn’t received the axle.  After a few calls to Colin and Axis Products I finally tracked it down.  It was scheduled for delivery the day before we were scheduled to go on our first camping trip!  The shipping company agreed to let me come pick it up as soon as it arrived at the depot.  Here it is in the back of the truck.

The New Axle

Lucky for me, a friend agreed to leave work early to come help me.  We jacked the axle up under the trailer to see if the dimensions were right.  Phew, it fit nearly perfectly against the existing mounting plates.  The bolt holes on the new axle did not align with the existing bolt holes on the mounting plates.  I was told to expect this and was ready to drill new holes with the appropriately sized bit.

Help from a Good Friend

With the axle in place we drilled one hole through both the mounting plate on the trailer and the mounting bracket on the axle (bolt on the right in the picture below).  For the second hole we tried to use a hole that already existed in the mounting bracket, but had to drill from the blind side of the mounting plate on the trailer to make the hole go all the way through (bold on the left).  In hindsight, this was a mistake.  It was impossible to align the holes by drilling from the blind side.  We came close, but it wasn’t close enough for the bold to go through.  So we had to run the drill bit back and forth in an effort to ream the hole to make it big enough for the bolt to go through.  This took quite a bit of time and effort.  If I did this again, I would make sure to drill the hole straight through in one shot.  That way I would know that the holes would align.

Mounting Bolts

After what seemed like hours of drilling, we finally managed to put the bolts through.  Tightening the bolts was another chore.  One of the bolts wasn’t too bad because we could reach it with our impact wrench.  The other required persuasion with a big crescent wrench and a breaker bar.  I’m starting to break a sweat just thinking of how hot it was that day.  And my friend volunteered for this! We finally had the axle on by around 4:30 PM.  I was relieved that we would have a little time that evening to pack for our trip the next morning.  But, hold on.  When we went to put the wheels on, they didn’t fit.  Arrrrrrgghhhh!  The bolt pattern was correct, but the hole in the middle that the dust cap comes through was too small.  So began the frantic hunt for rims that would fit.

We rushed to Tractor Supply and found some trailer rims that looked like they would fit.  We brought them home and found that the rim did fit, but that the tire that came on the rim was too big.  By that time it was too late to find any other rims.  I would have to wait until the morning to continue the search.

The next morning I went to Champion Tire, in Ringoes NJ.  The folks at Champion saved our vacation.  They sold me rims identical to the ones I got from Tractor Supply, but were able to put my old, smaller tires on them.  This time the rim and the tire fit.  It was a tight fit (more about that in another post), but good enough to get us on our way.

We lost a day of our vacation, but we were still able to go.  Without the help of good friends and the folks at Champion Tire, our vacation would have been ruined.  I am grateful for all their help.

Replacing Windows and Sealing Leaks

So, what should I do while waiting for the axle to arrive?  I decided to replace some cloudy old plexiglass windows and seal some leaks.

One of the previous owners of the trailer decided to replace both the front and rear windows with plexiglass.  Given that this trailer does not have a rock guard over the front window, I can understand why he decided to use plexiglass.  But, now many years later, the plexiglass had become opaque, had warped, and the tape and caulk holding the windows into their frames was coming loose.  I decided to replace them with tempered glass so that they would be stronger than regular glass and so that if they did break for some reason, there would be less risk of injury.  I measured the size of the windows and ordered the tempered glass from my local window shop.  I also ordered butyl tape and plastic window glazing from Vintage Trailer Supply.  And I ordered Acryl-R sealant from Airstream.  When all the supplies came in, we were ready to perform the replacements.

To remove the window you simply remove the arm that allows you to roll the window in and out and then remove a single screw that hold the window frame in its guide track.  Once removed we either pulled out the plexiglass or broke the existing window to remove it.  Then we spent considerable time removing the sticky caulk that the previous owner had used to seal the window.  Once removed we placed the butyl tape in the recess which holds the glass, laid the glass in place over the butyle tape, and then installed the plastic window glazing to hold the window in place and shed water.

Here is a picture of the window replacement pro installing the new tempered glass.

Window Replacement

Once the glass was installed we slid the frame back into the track, locked it in place with the screw, reinstalled the extension arm, and then sealed all around the window frame with Sikaflex 441 in the large gaps and Acryl-R in the small gaps and seams.

Oh it looks soooo much better.  Now we can see through the front window, through the trailer, all the way through the rear window.  I can see anyone who might be tail-gaiting.

 IMG_0483

Now, how much longer until that axle arrives? …

Does it Need a New Axle?

As I read through the Airstream Forums, I came across stories of axle failures.  It turns out that there is a well known problem with the axles originally equipped on Airstreams from the early 1960’s.  The shape of the spindle on which the bearings (and the wheel) spin makes it susceptible to weakening over many years of wear.  In this weakened state the spindle can break in two causing the wheel to break free.  Imagine your wheel suddenly no longer connected to the axle.  Imagine the damage the wheel could cause to the wheel well.  Imagine even worse damage that could result, especially on a trailer that has only one axle.  If you need help imagining how bad this could be, then read this description of a 1965 Caravel that lost its wheels while driving down the highway.

I was sure that the axle on our trailer had never been replaced.  But did it really need to be replaced?  How could I tell?  I found many suggestions for determining whether or not a torsion axle should be replaced including:

  1. Have someone ride in the trailer while you are towing it (note: this is illegal).  Have them tell you how rough the ride is.

  2. Look for fasteners working loose inside the trailer.  This is typically caused by the trailer riding rough.

  3. Look at the angle of the trailing arm from horizontal.  How many degrees toward the ground is it pointing.  When you jack up the trailer, does the angle of the trailing arm change or is it frozen.

Ultimately I was convinced to replace the axle when someone told me, “The axle on your trailer has a well known reputation for catastrophic failure.  Don’t waste time inspecting it.  Just replace it ASAP!”

Now where was I supposed to get an axle and how was I supposed to install it?  I don’t have a shop to work in.  Any work that I do myself will need to be done in my gravel driveway.  I found that there are basically two manufacturers of the kind of axle I needed:  Dexter and Axis.  When you order an axle from the manufacturer you need to supply all kinds of measurements to ensure that the axle will fit your trailer properly.  I didn’t feel confident about supplying those measurements myself, so I looked for someone who could do it for me and guarantee that the axle would be ready to install when I received it.  I contacted three different sources for help.  I first contacted the folks at Inland RV.  At the time they told me that while they could order an axle for me, I would need to weld the shock mounting brackets on myself.  They recommended that I speak with someone at the Airstream dealership in Los Angeles.  I made that phone call and collected information about the axle that I could get via that route.  Through Airforums.com I was also referred to Colin Hyde Trailer Restorations.  Colin is well known in the Airstream community as the regular expert guest on the Vintage Airstream Podcast.

Finally I decided to purchase an Axis axle through Colin.  From the time I placed the order with Colin I had a about two months in which to remove the old axle and install the new one before going on our first camping trip.  Let the countdown begin.