Somerset PA

A few weeks ago we met my parents in Somerset PA.  Somerset is about half way between our home in New Jersey and where I grew up in Ohio.  This makes it an ideal meeting place or stopover place.  This time I booked a stay at the Glades Pike Inn so that we could all spend a little time together before my parents took John to Ohio and we returned to New Jersey.

On the first day we toured the Flight 93 Memorial.  I didn’t expect to be affected much by the memorial, but I was surprised at the emotions that it stirred.  I was choked up and close to breaking into tears the whole time we were there.  I guess I had managed to repress some of those memories.  The stories displayed on the placards brought them all back.

After having our fill of sad memories we headed back to Somerset for dinner.  Along the way we saw signs showing that we were driving on the Lincoln Highway, the first highway to cross the country.  The highway has a fascinating history.  Now it’s hard to imagine that private investment was needed to connect local roads into a transcontinental highway.  Of course you could travel across the country by train at that time, but the roads were not yet connected.

LincolnHighway

On the second day we took my parents to see Frank Lloyd Wright’s Falling Water.  Angie and I had gone on the tour the previous winter.  We had better weather for this visit.  If you find yourself in the neighborhood and you have any appreciation at all for architecture, engineering, and construction, then I highly recommend a visit.  As the docent explains on the tour, it’s a house that just couldn’t be built today.  Modern regulations would prohibit the location of the house (directly over a valuable water supply) and many design elements (patio walls too low to prevent people from falling over).  Well worth the price of admission to see this American icon.

FallingWater

Jersey Shore Haven 2014

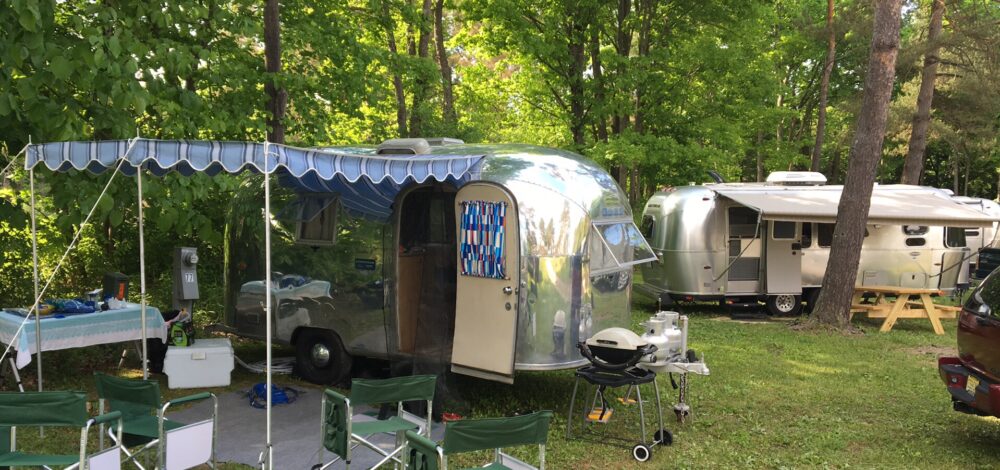
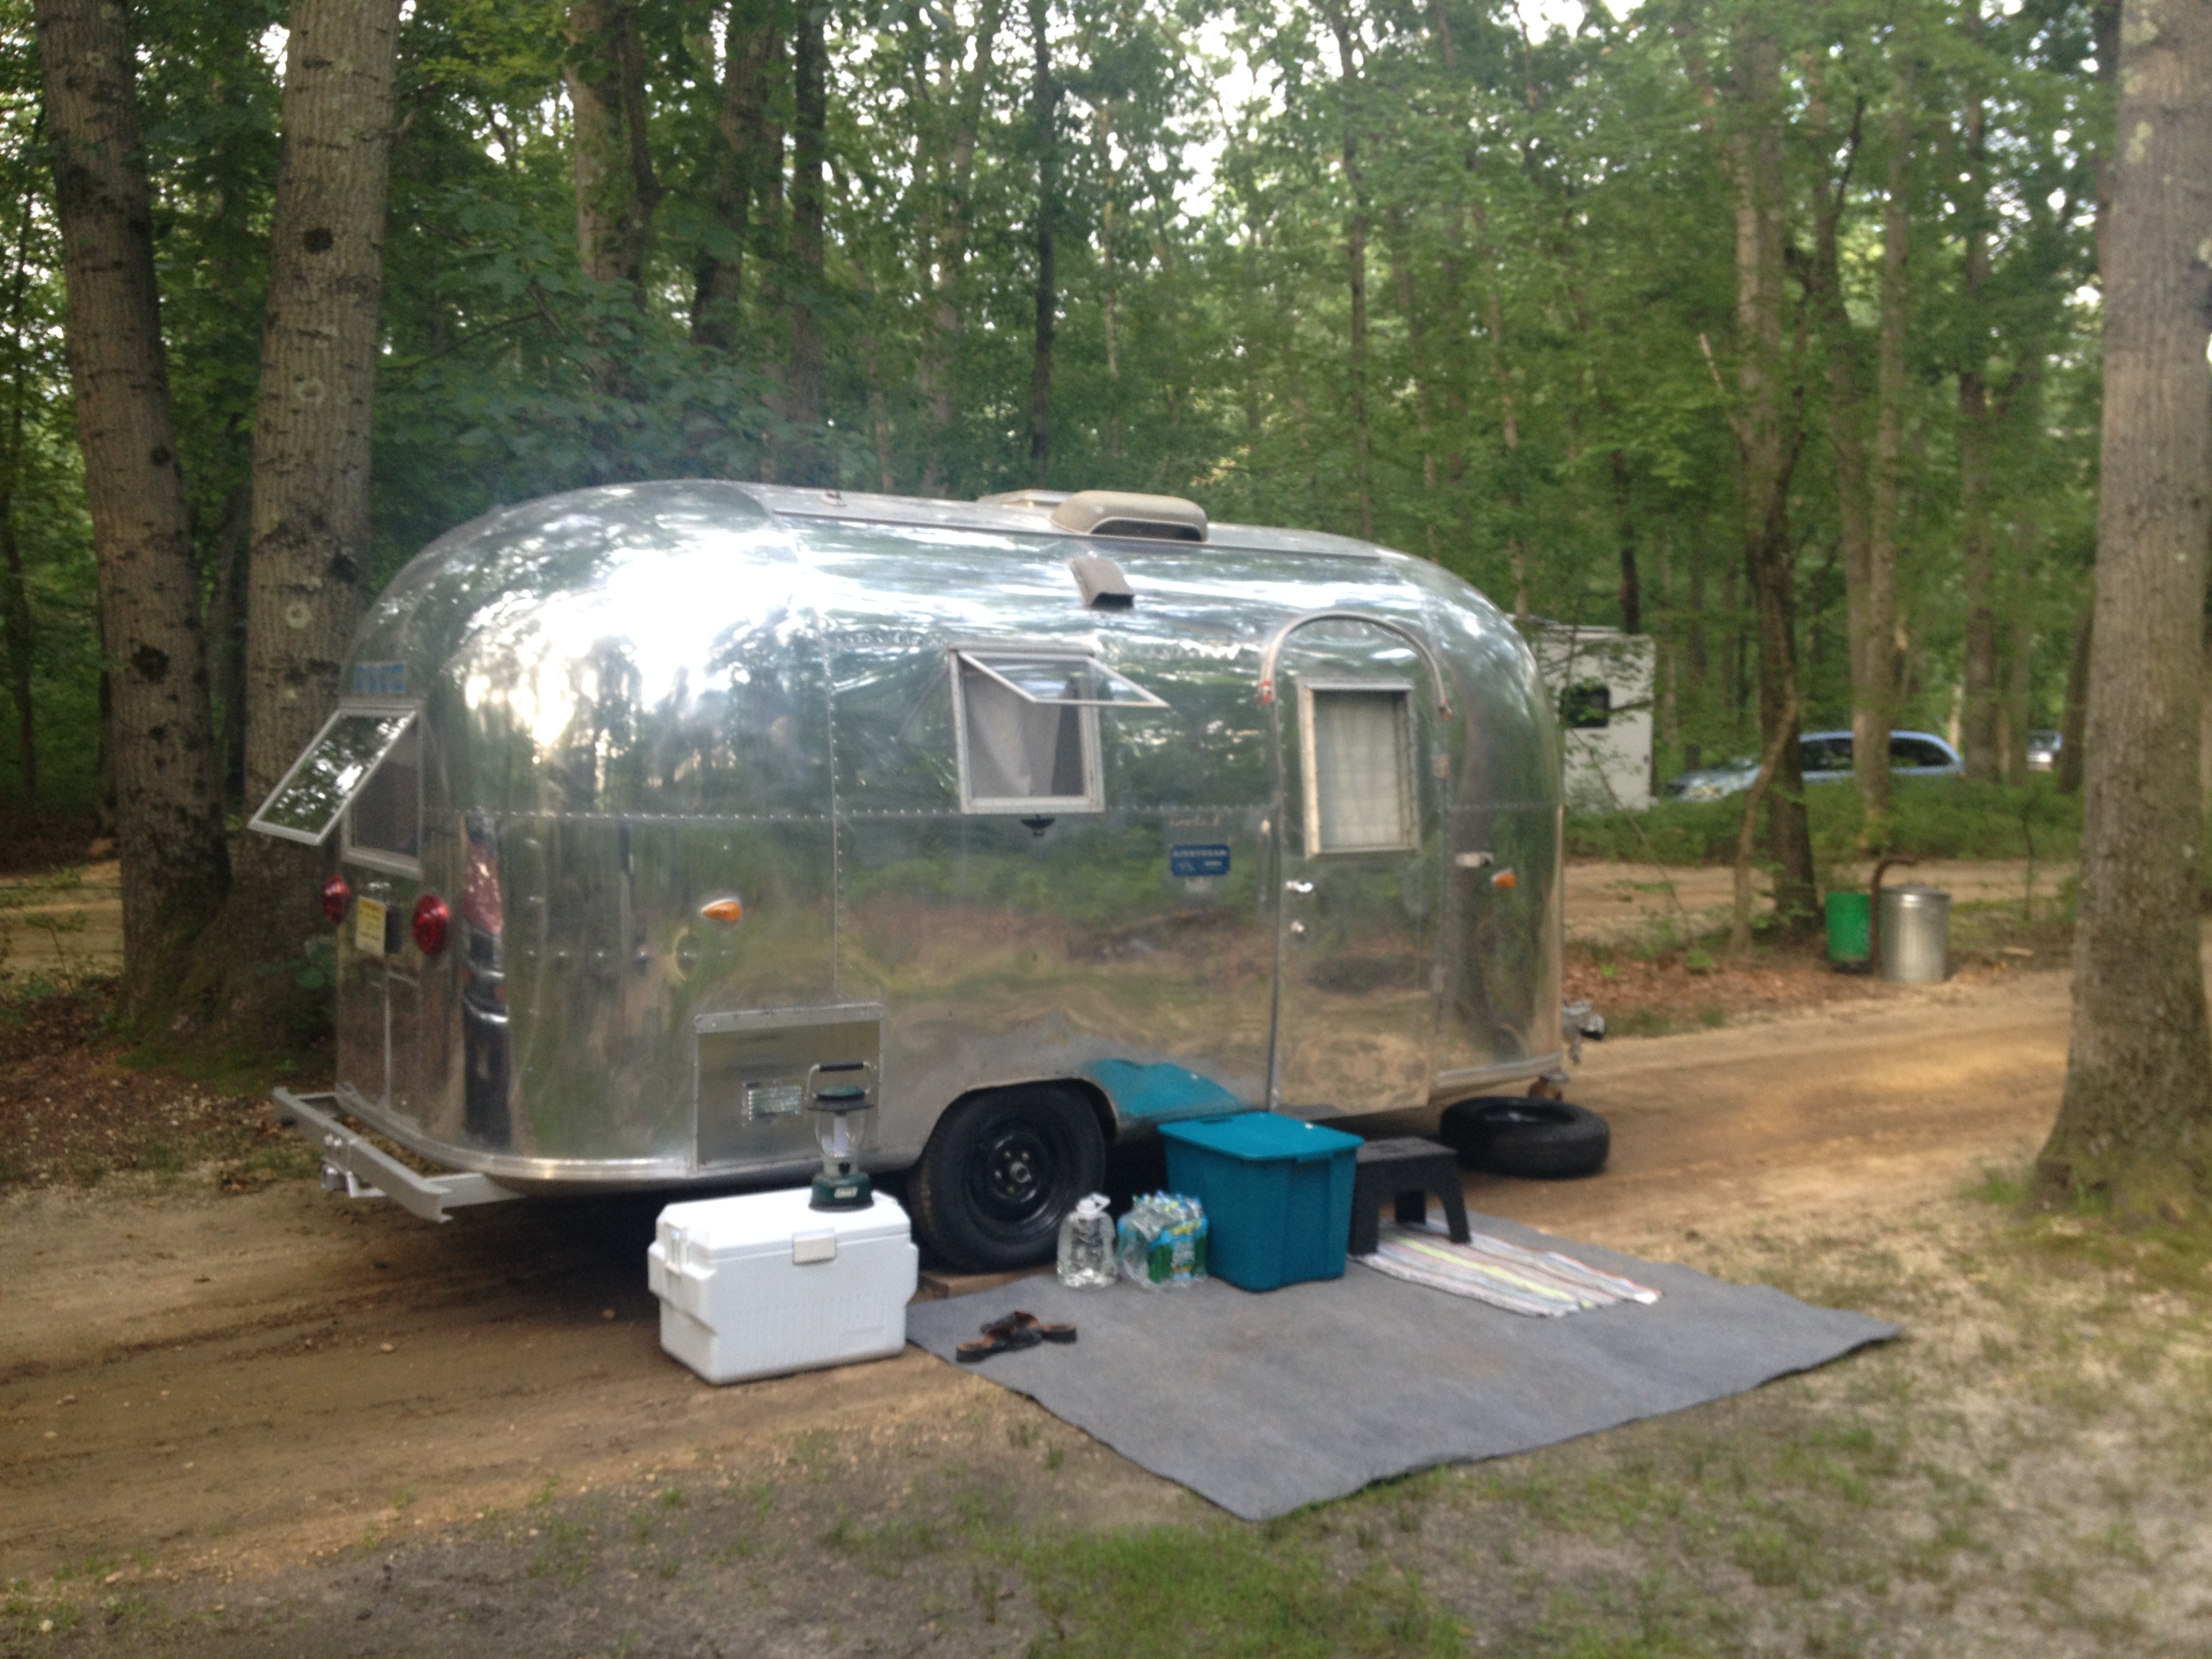
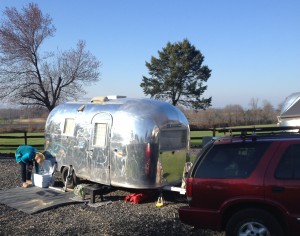
Two years ago we camped at Jersey Shore Haven (JSH) over the July 4th holiday.  That was the first time that we saw fireworks on the beach.  It was impressive.  We decided to do it again this year.

The day before going we had a pig roast at our house with around sixty guests.  We were lucky to have good friends who helped us set up and clean up from the party.  Without them we wouldn’t have been able to head to Jersey Shore Haven the very next day.

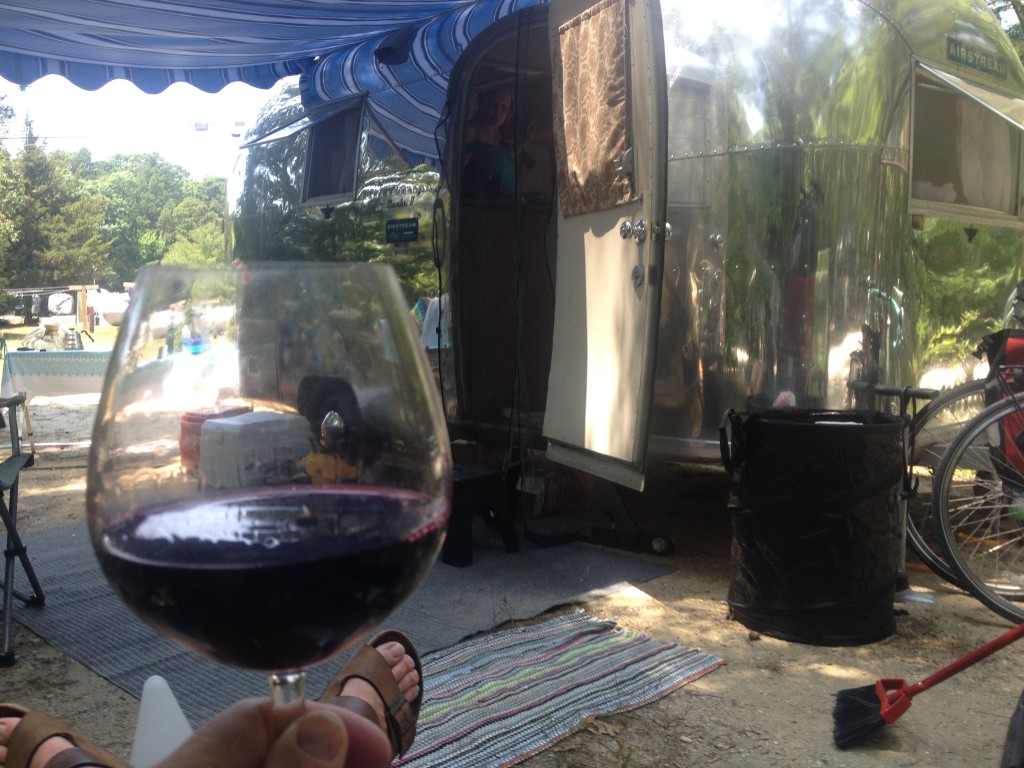
Once we arrived and set up it was time to relax with a nice glass of wine.  One of my favorites:  Peterson Winery’s Mendo Blendo.

ReclineWine
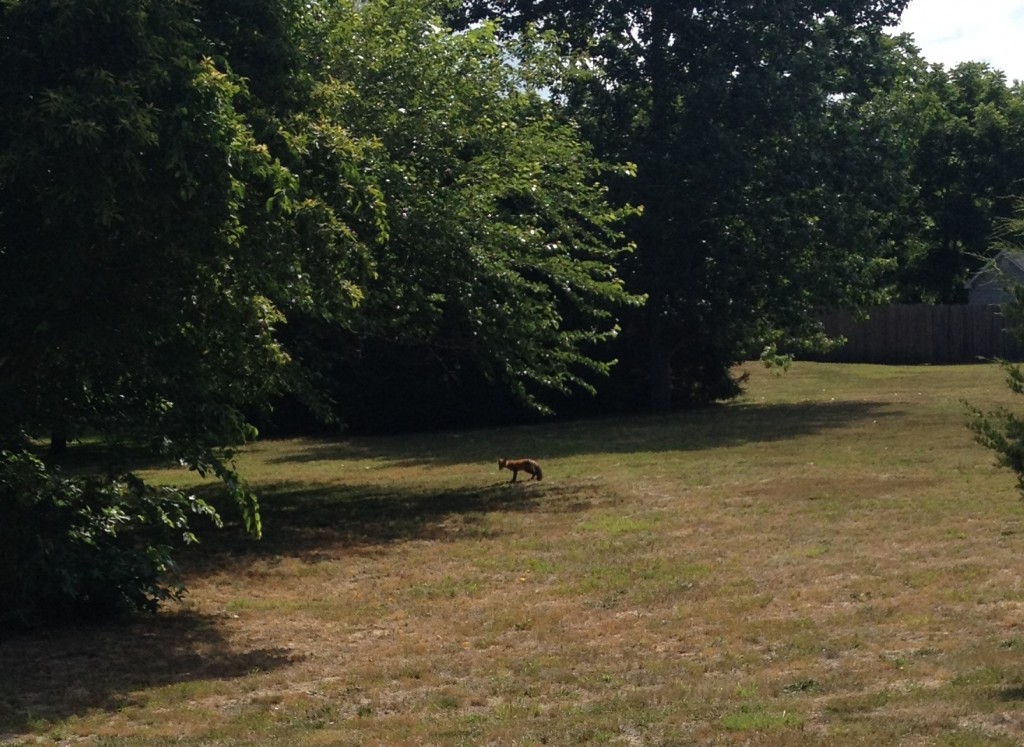
In the morning of our second day I took a 10 mile bike ride around the neighborhood.  Along the route a man in a pickup truck pointed out this juvenile fox standing under a tree eating mulberries.  The fox didn’t seem to have any problem dining as we watched from maybe 50 yards away.

BabyFox

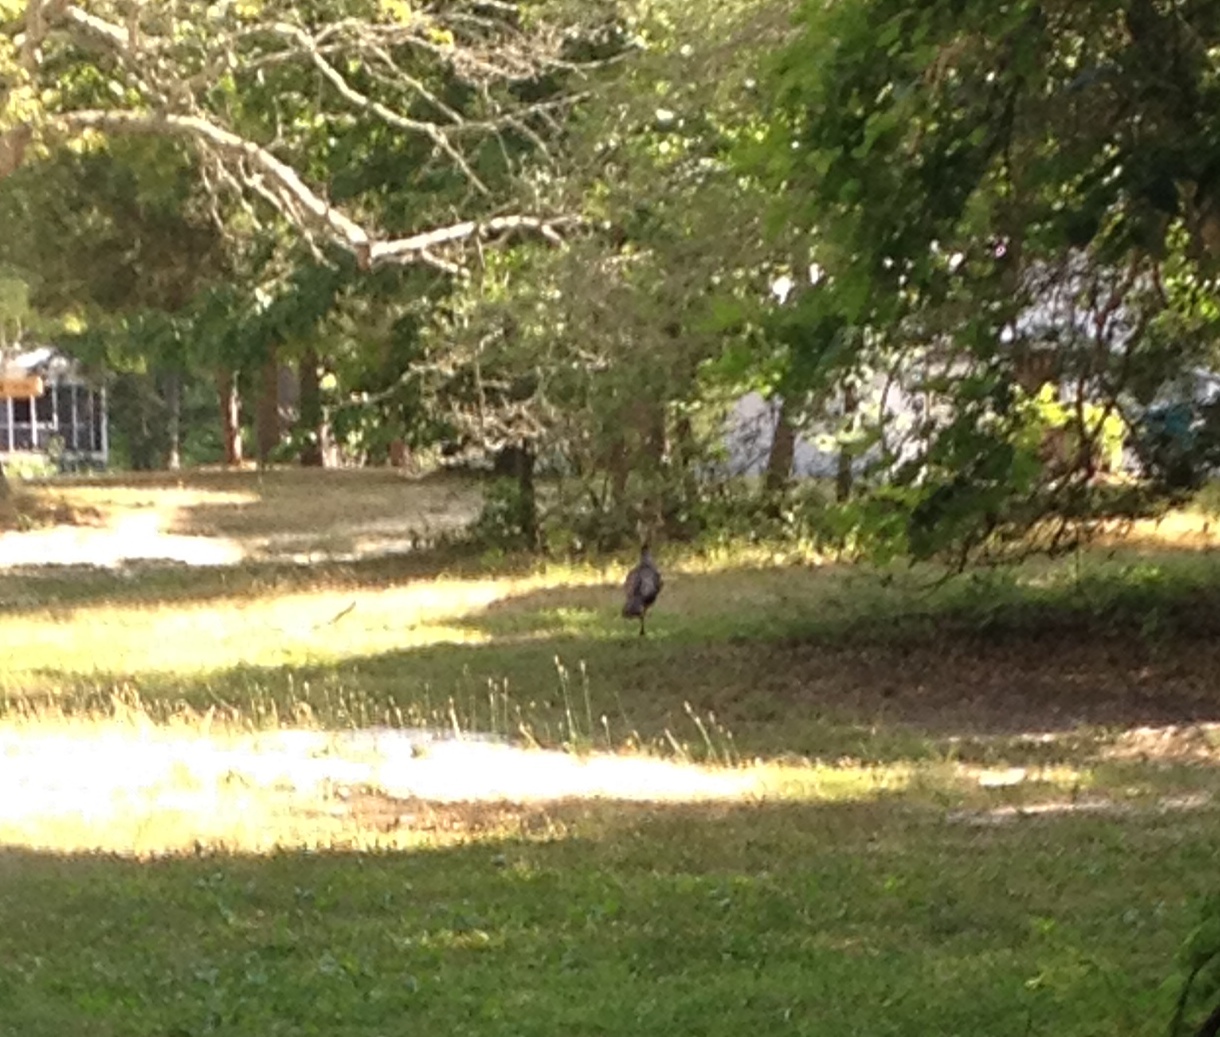
As I turned into the driveway of the campground, I caught a glimpse of a wild turkey.

Turkey

Later that day we went to the beach for a few hours.  On the way back we stopped by Mike’s Fish Market in Sea Isle City.  We grilled grouper, swordfish, and scallops for dinner.  All subsequent seafood dinners will be compared to this one.  It was absolutely delicious.

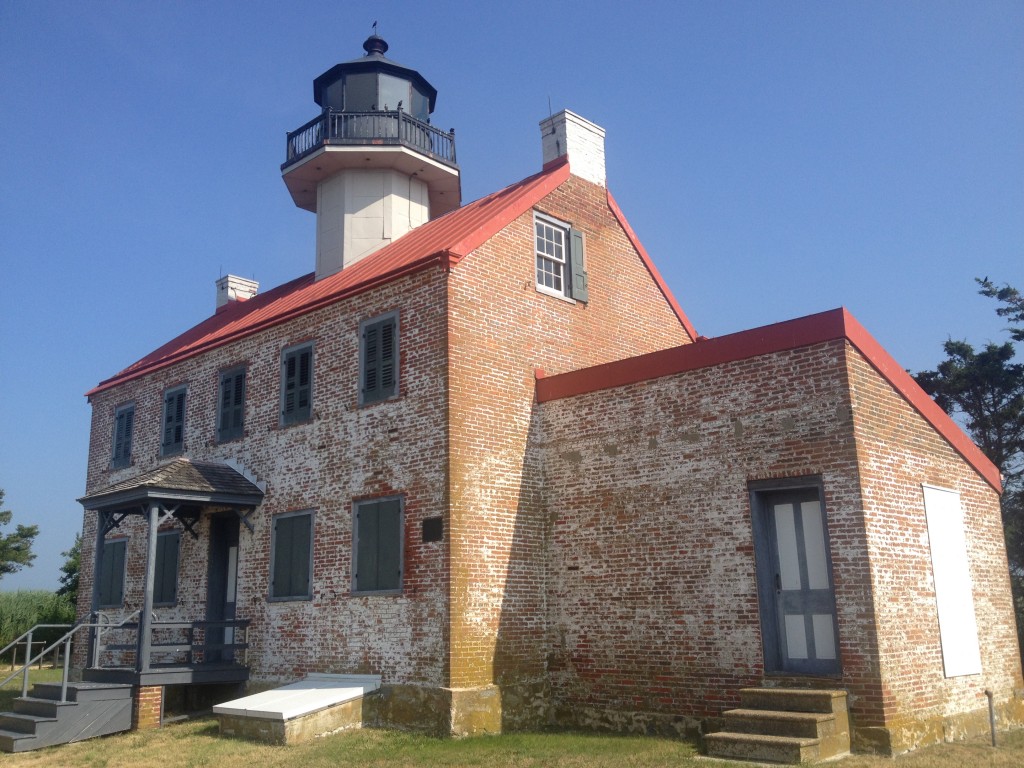
A couple of days later I took a longer bike ride.  My plan was to ride to the East Point Lighthouse on the Delaware Bay about 15 miles from JSH.  Now, I had heard about greenhead flies.  I had seen the boxes scattered about that were supposedly there to control them.  But, I hadn’t really experienced them.  I did on this ride!  About half way to the lighthouse they began to pursue me.  They bit me a few times even through my shorts and shirt.  They provided plenty of motivation for me to keep up my pace.  Otherwise they would swarm around me.

With the encouragement of the flies I kept up a good pace and made it to the lighthouse.

The lighthouse was built to guide fisherman to the mouth of the Maurice River.

EastPointLightHouse

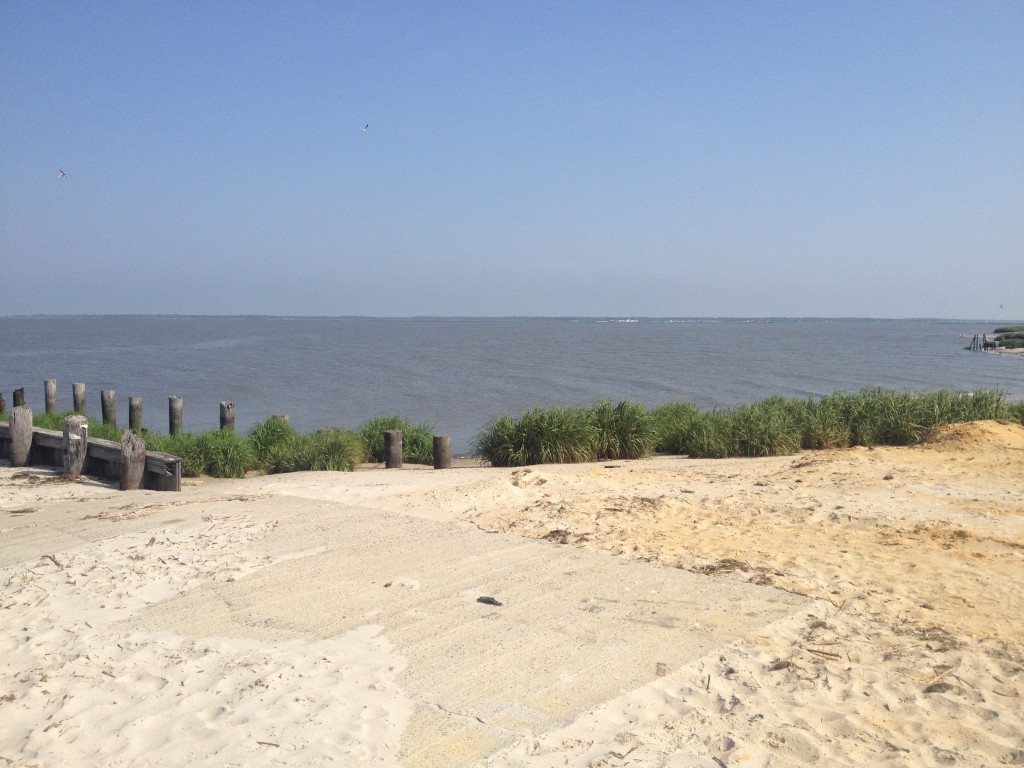
Here is a picture of the Delaware Bay facing away from the lighthouse.

DelawareBay

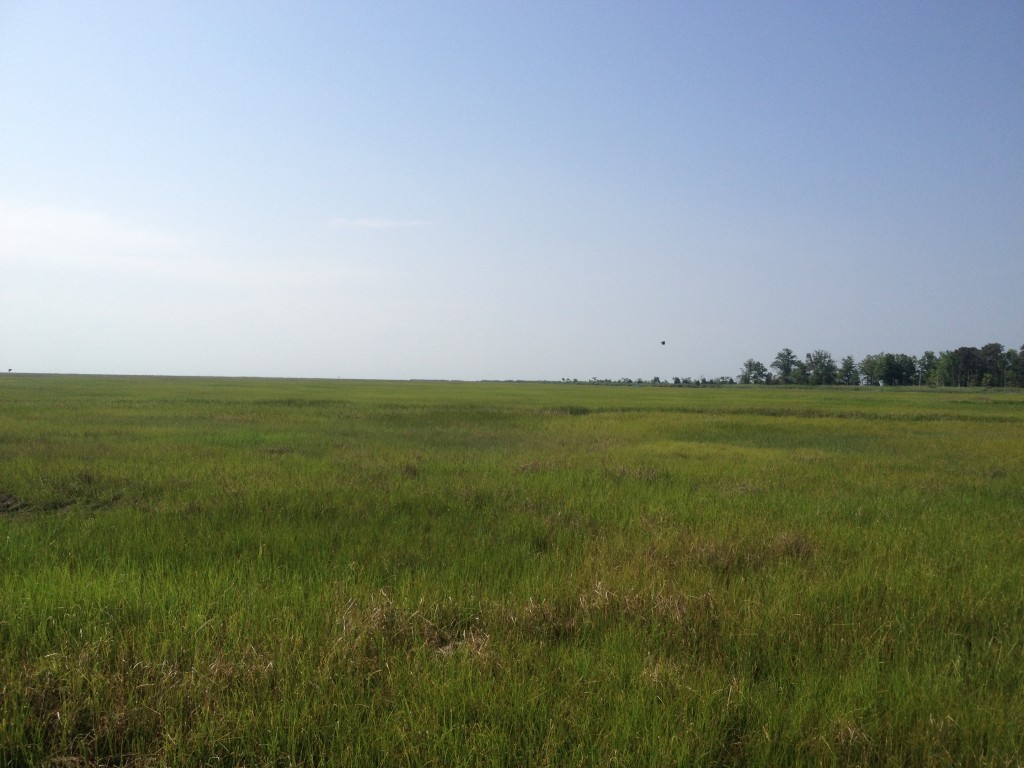
And here is a picture of one of the salt marshes I rode through along the way.

Marsh

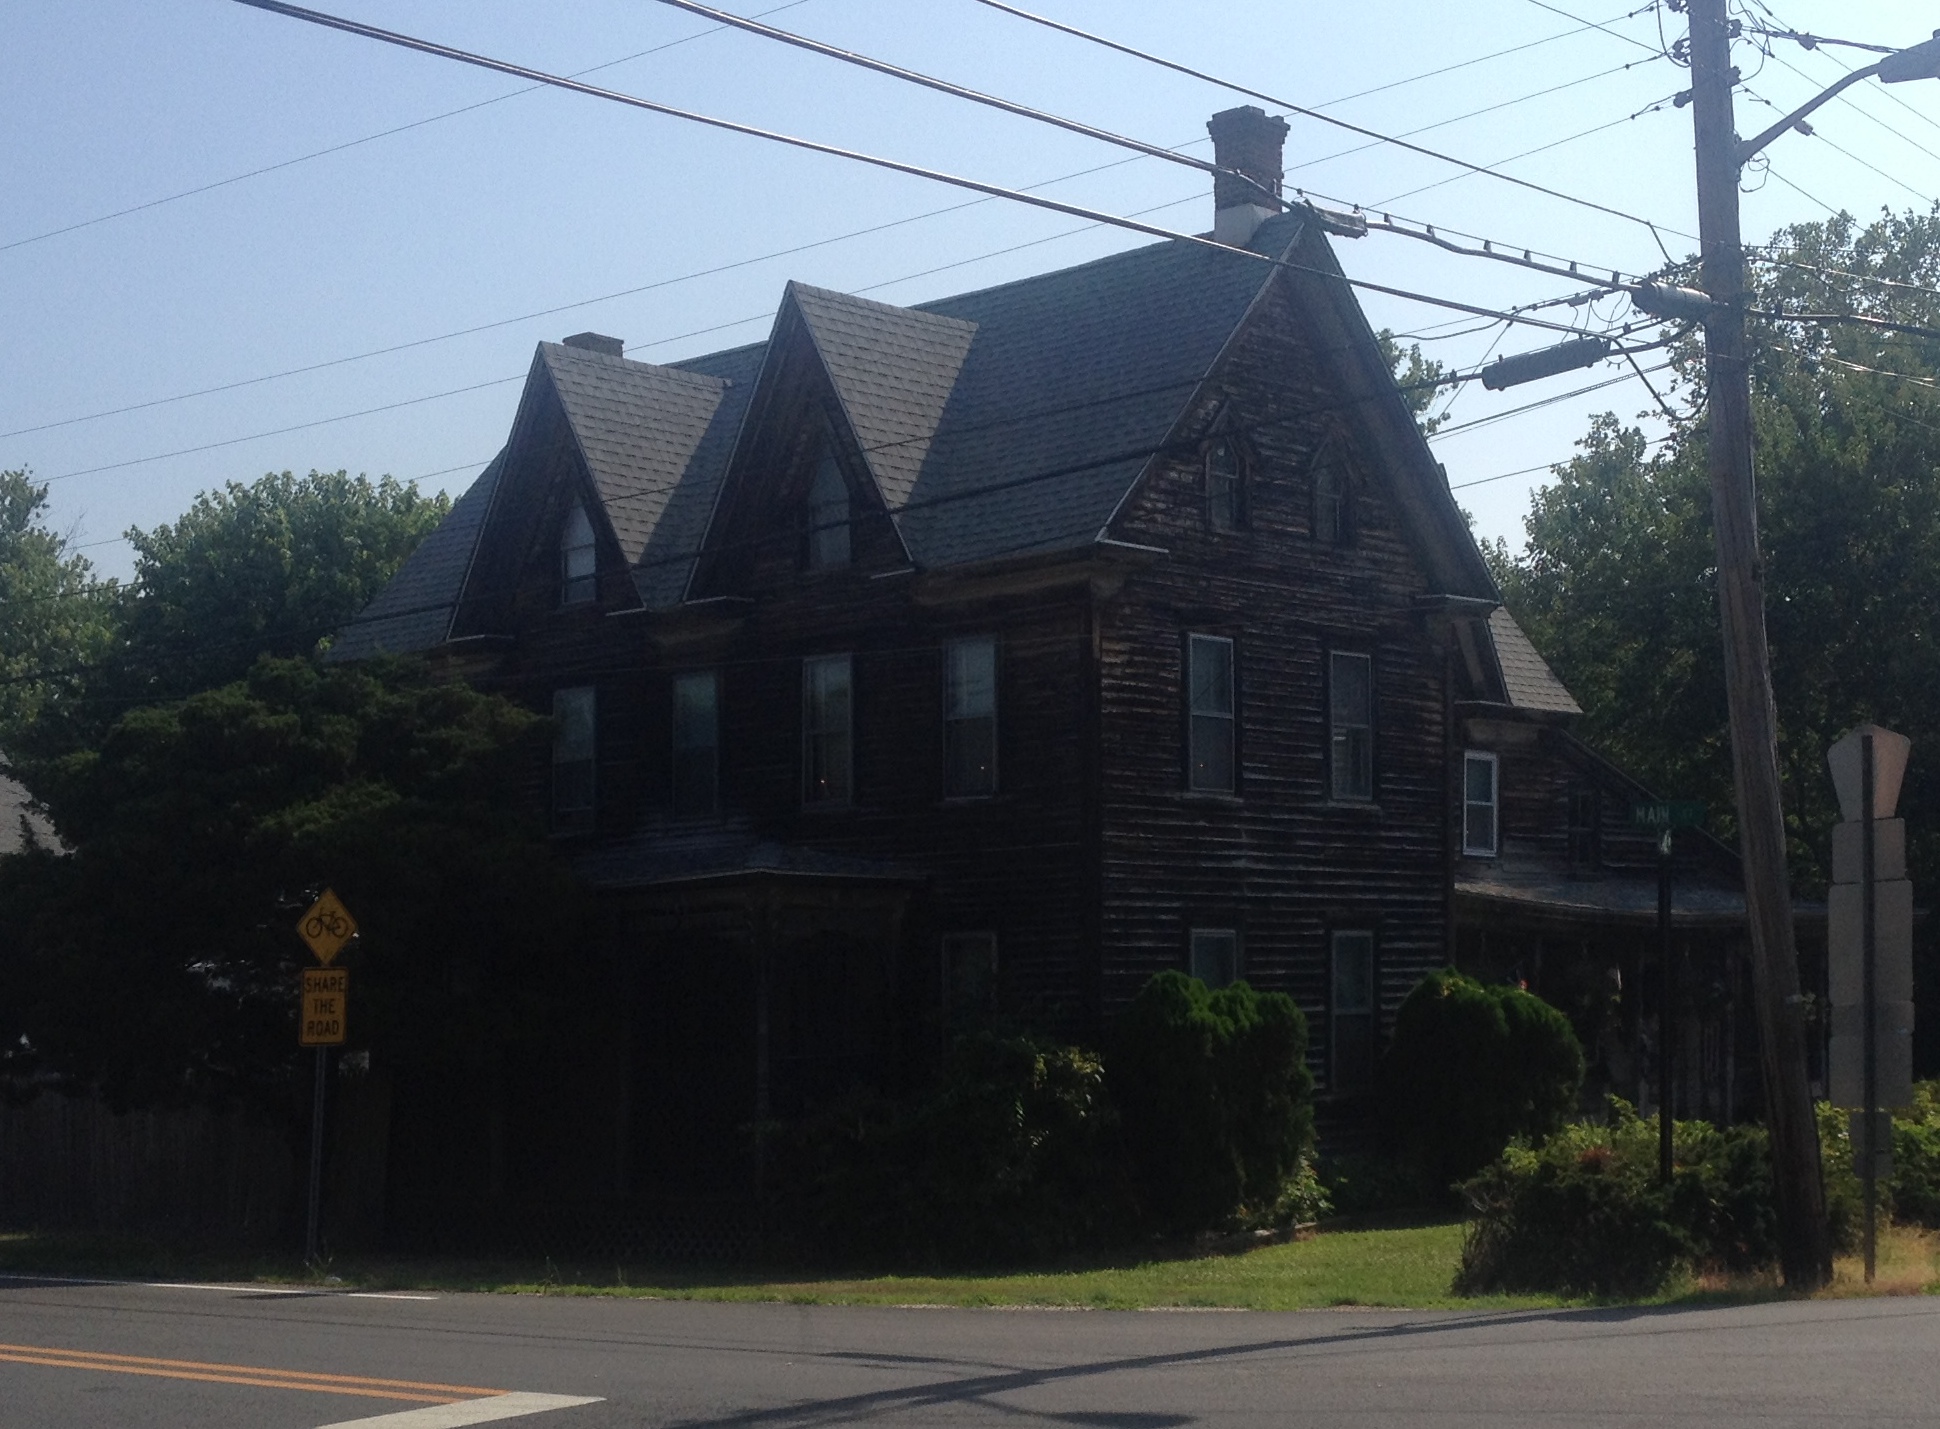
I thought this old house was interesting.  Not a lick of paint on it and yet it looks like it has stood on that corner for a long, long time.

WoodHouse
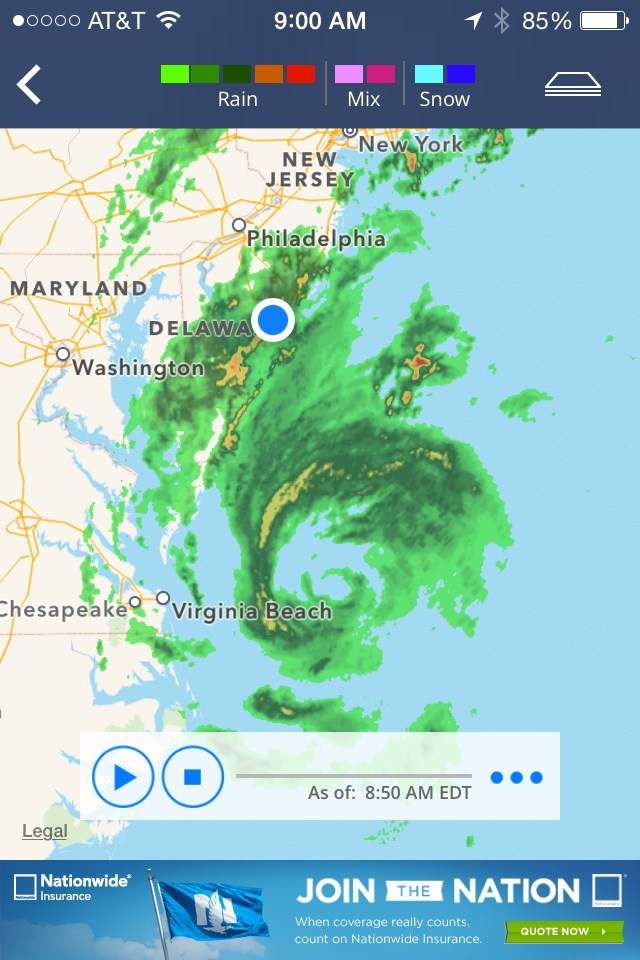
Later in the week we had a visit from hurricane Arthur.  The blue dot on the radar map shows our location.  The storm was moving north east so the map shows the worst of the storm for us.

Arthur

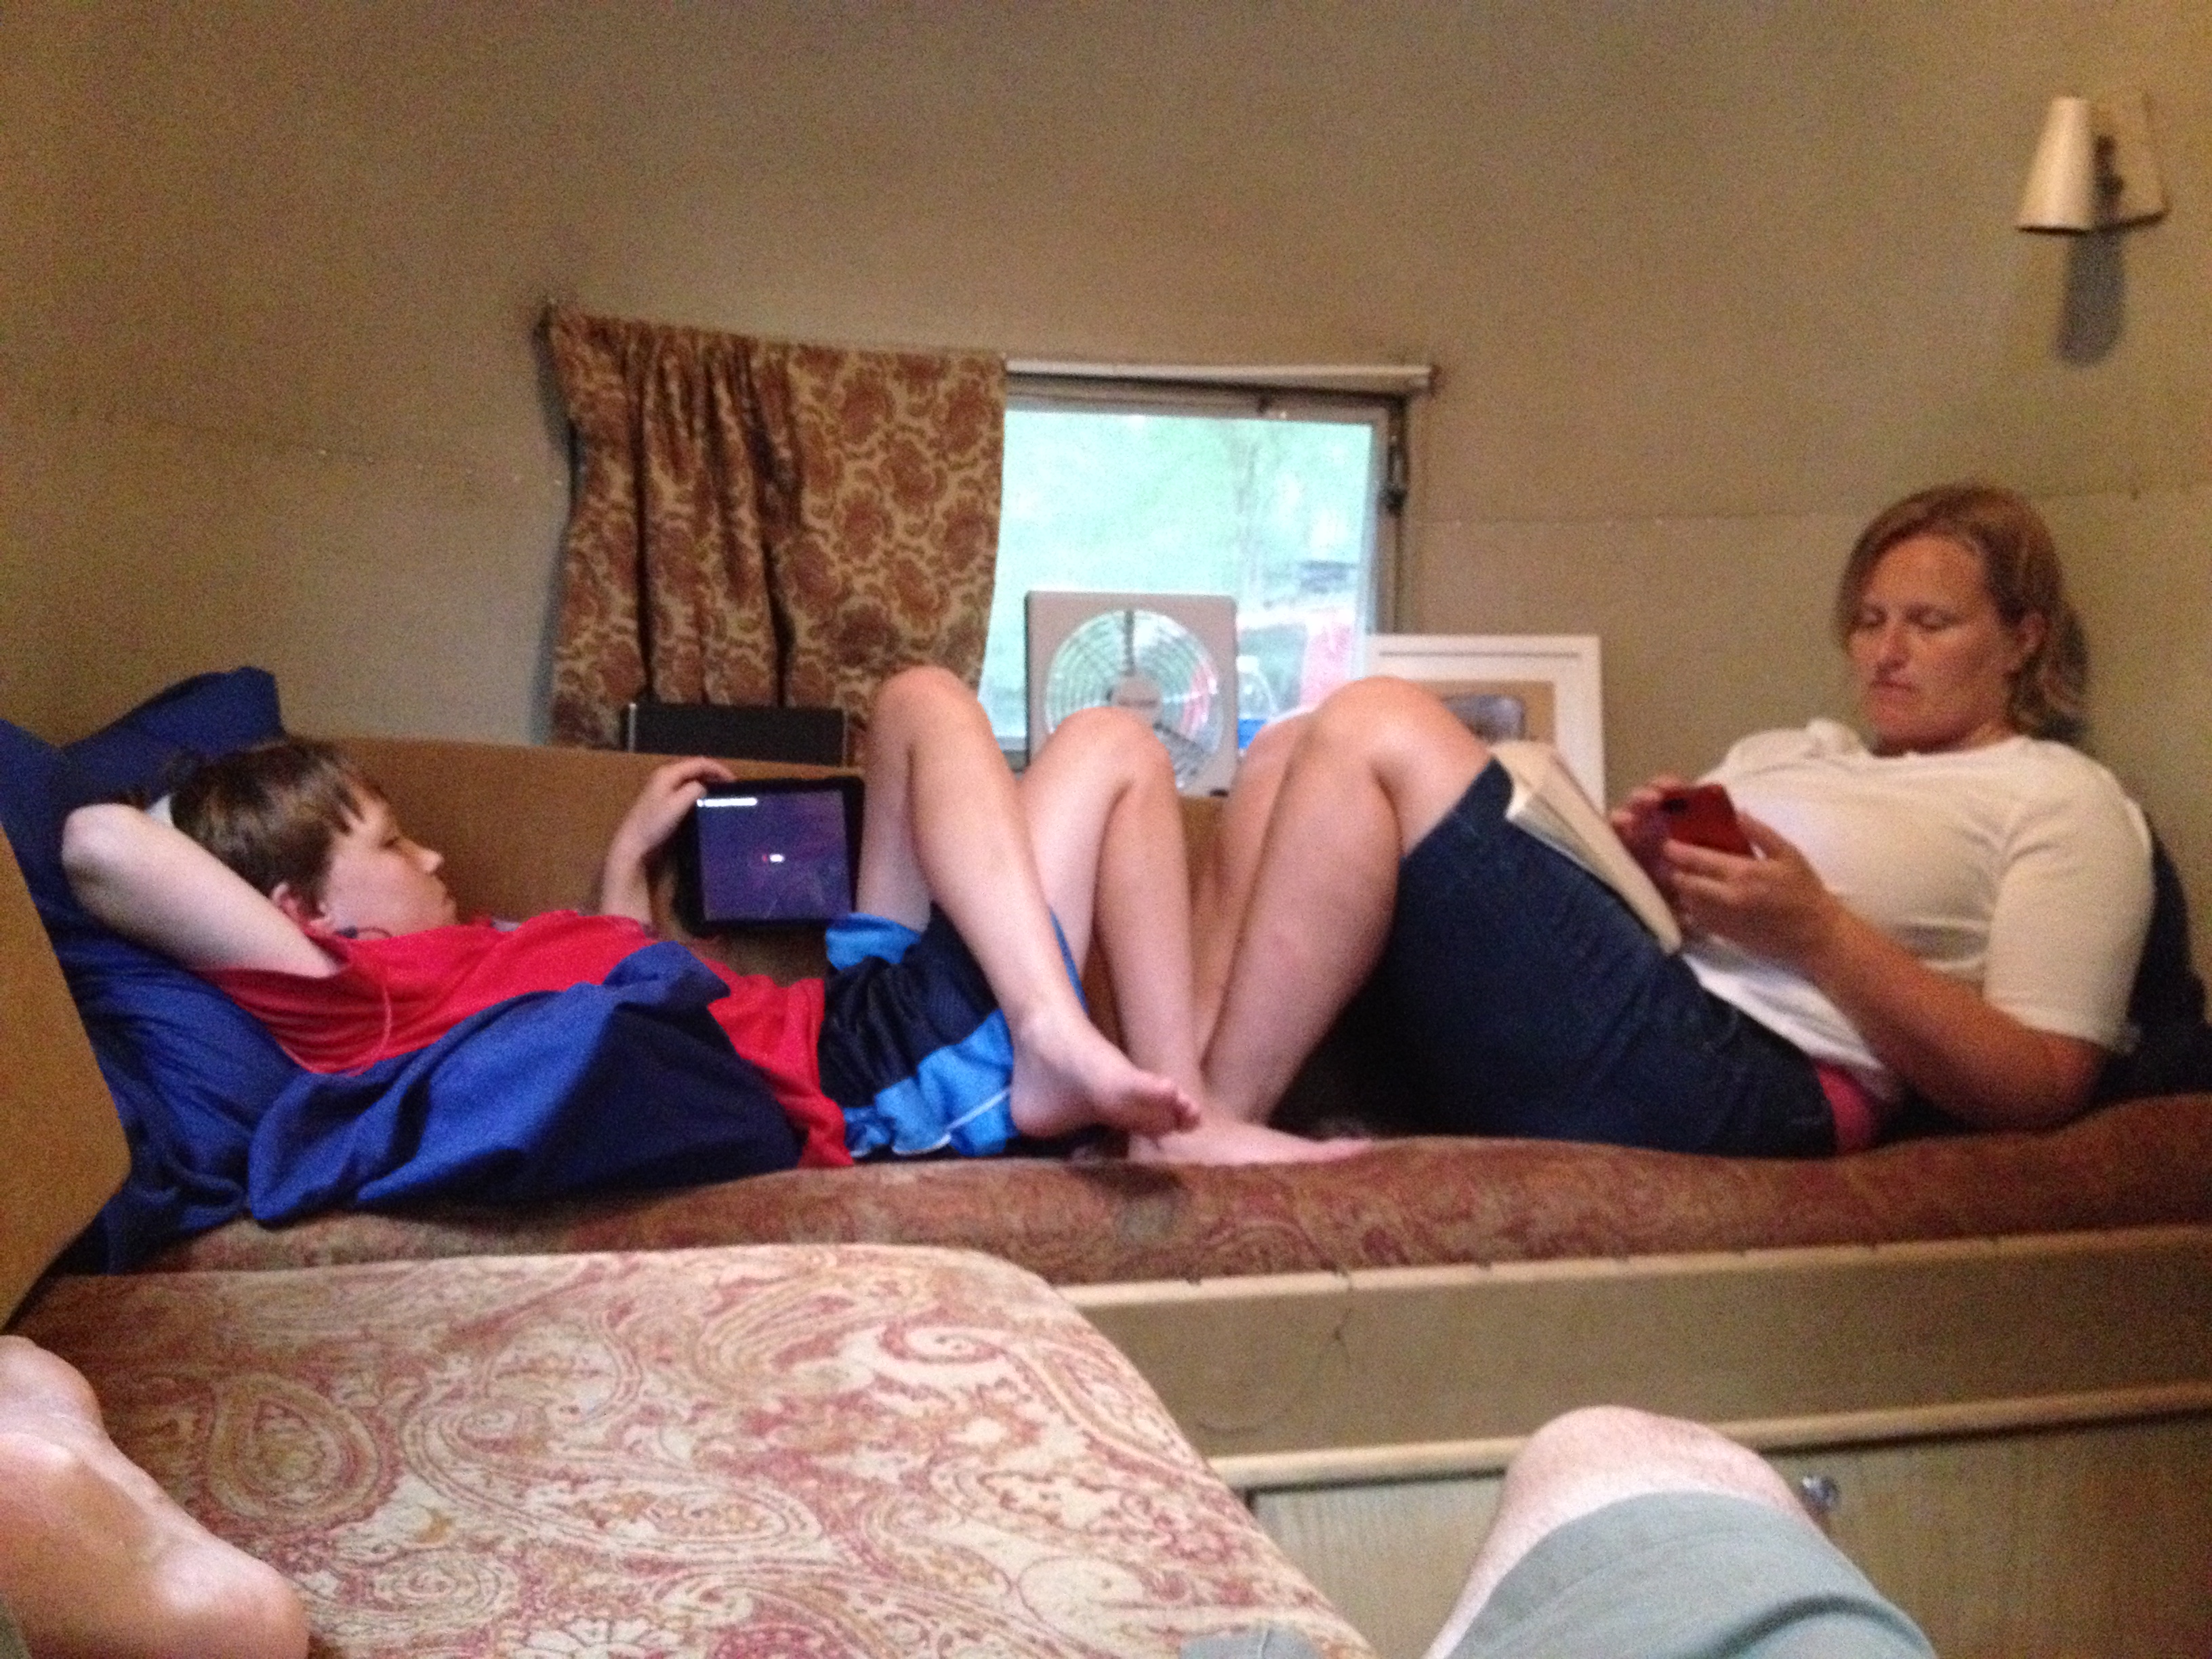
During the storm we read our books, played games and watched videos on our iPads.  The wind and rain was no problem for the camper.  Much better than being in a tent!  I only worried that one of the trees near the camper might lose a limb or fall over on us due to the wind.  Luckily that didn’t happen.

WaitingOutRain

Most firework displays were rescheduled due to the storm.  We planned to see the fireworks in Stone Harbor on Saturday.  When we tried to drive into Stone Harbor there was a line of traffic backed up all the way past the NJ Turnpike.  We turned around and decided to head back to the campground, but then I had the idea of driving into Avalon and then, once on the island, seeing how far south we could drive back toward Stone Harbor.  It turned out that we were able to park at the south end of Avalon and walk down to Stone Harbor to see the show there.  We had front row seats.

PreFireworks

Fireworks

This was a vacation to remember.  Very relaxing.  A chance to spend time with some of our Airstream friends and an opportunity to meet new ones.  We enjoyed ourselves so much that we are now on the waiting list for an opportunity to purchase a share at JSH.  We are looking forward to many return visits.

Turkey Swamp

With the floor back in the trailer I was itching to go camping.  I didn’t do all that work so that Allie Airstream could just sit in the driveway!

John had a two-day soccer tournament in Neptune, NJ near the shore which is about an hour away from our house.  We decided to take camp at Turkey Swamp Park, which is only about 20 minutes away from the tournament.  Because of the tournament the only time we spent at the campground was sleeping and eating breakfast.  But it was a good trial run.  We learned at least one thing:  Never forget to bring the stabilizing jacks!  Without them, the trailer wobbles around when you move inside.

TurkeySwamp2014Turkey Swamp is a nice campground.  All of the sites are pull-through with water and electric.  No sewer unfortunately, but the bathhouse was not far away.

We enjoyed beautiful weather that weekend.  We picked up some clams at Woolley’s Fish Market for the tailgate with the soccer team.  I grilled the clams and lots of hotdogs for the boys.  Both the boys and the parents seemed to enjoy themselves.

Unfortunately, the boys record was 0 wins, 3 losses, and 1 tie in the tournament.  But as they say, every opportunity to play is good practice, no matter whether you when or lose.

Our next trip would be our planned trip to Jersey Shore Haven next weekend.  Stay tuned from another update from the Jersey Shore.

Sacrificial Burning of Rotted Floor

Not long after finishing the floor replacement we hosted a pig roast.  The pig wasn’t the only thing we roasted!  We also roasted the old, rotted floor in a sacrificial offering to the Spirits of Airstream in hopes that our offering would help protect the new floor from premature decay.

The Floor is In

The front floor replacement project is finally complete.  What a tedious job it was.

Originally I had planned to drop the belly pan so that I could slide the new floor in as one sheet and bolt it properly to the frame.  But before beginning to drill out the belly pan rivets I had a closer look at how the belly pan comes up between the exterior shell and the C-channel that rides on the perimeter of the floor..  That’s when I found that the belly pan comes up and then is crimped over the outside edge of the C-channel.  This wasn’t obvious because the crimp was covered with some black, sprayed-on sealant.

BellypanCrimpI decided that it would just be too much work to scrape off the black sealant, uncrimp the belly pan, drill out all the rivets and then do it all in reverse after the new floor was in.  Instead I would install the floor without dropping the belly pan.  This meant that I would need to use screws to fasten the floor to the frame and the C-channel to the floor rather than the bolts I had originally planned to use.

With that decision made it was almost time to install the new plywood.  But first I patched the torn portions of the belly pan.  The tears were caused by the floor sagging as you stepped into the trailer.  I used 5052H32 0.032″ aluminum for the patches and solid 1/8″ rivets to fasten the patch to the belly pan.  Here is a picture showing the patch just below the right side of the entrance.

BellypanPatch

And finally I installed the new floor sections.  I had to cut the front section in half in order to slide it into position.  I used self tapping screws to fasten it to the cross members.  I chose not to fasten to the main frame rails because the original floor was bolted only to the cross members and not to the main frame.

FrontFloor

You can see on the left side where I brought the umbilical cable and trailer cabling up through the floor and connected them in a new junction box.  Rather than sealing these wires under the floor as they originally were, I thought it might be useful to have access to them in the future.

No more sagging floor when you step into the trailer!

EntranceFloor

The C-Channel is fastened to the plywood with stainless screws and nylon washers.  The plywood is fastened to the cross members with epoxy coated self tapping screws

Screws2

.I stuffed the walls with new fiberglass insulation that I had left over from a previous project.

Insulation

And then I found some help to reinstall the interior walls.

JohnClecos

And now that the front gaucho is reinstalled, you can barely tell that I did any work at all.

GauchoReinstalled Still, I know that everything is sealed and solid now.  And that is worth the effort.

Cleaning Up the Frame and Preparing the New Floor

Since my last post I’ve been pretty busy.  I removed the old floor exposing some rusty frame.  Luckily the main frame rails and even the cross member were in pretty good shape.  Only a very limited amount of welding was required to strengthen the cross member in a couple of spots.  A good friend brought over his welder and fixed those spots.

floor_removedI cleaned the exposed frame with the wire brush wheel on the angle grinder that my step-father gave me and then painted the metal with POR-15.  I neglected to wear gloves while painting.  That was a mistake.  POR-15 bonds to skin just as well as it bonds to metal.  The only way to get it off was basically to scrape my skin off.  It took about 3 days worth of scrubbing and scraping to remove it from my hands.  I can only hope that it will stick to the frame at least as well as it stuck to me.

Painted_Frame

Next I used the old floor as a template for cutting new wood.  The original plywood was somewhere between 5/8″ and 3/4″.  I chose to use 3/4″ marine grade plywood which was just a little bit too thick to fit under the C-channel around the edges.  So I used my grandfather’s trusty router to remove a 1/16″ or so around the edges.  I then sealed the edge that goes against the outer walls with Marine-tex epoxy resin.  That stuff costs $55 per quart!  I had better not see any rot for at least the next 25 years!

New_Unpainted_Floor

And finally I painted the top and bottom with oil based primer.


Painted_FloorAnd now it’s time for the new floor to go in.  Expect more pictures very soon.


Patching Holes

I decided to take a short break from repairing the floor and turned my attention toward waterproofing.  With the interior wall panels removed I was able to test some suspected sources of the leaks that caused the floor to rot in the first place.  Our old trailer had a radio antenna mounted on the front.  This antenna was completely useless to us, but it did give the trailer a vintage look.  However, I suspected that the old, hardened gaskets against which the antenna were mounted were no longer water tight.  I slowly poured some water against the exterior above the antenna and then went inside to see what happened.  A small rivulet of water ran down the interior wall from the antenna hole.  Suspicion confirmed!  Since we have no use for that antenna and I did not want to find and further maintain those gaskets, I decided to patch the hole.

Here is a picture with the antenna removed.  You can see the hole where the antenna used to be mounted.  If you look closely you will see that there is a small circular hole above that looks like it has been filled with grey body filler.  I hadn’t planned on doing anything about that spot, but it comes into the story later.

antenna_hole_sm

Next I had to figure out how to make a 2″ x 2″ aluminum patch.  I have a nibbler for cutting sheet metal, but I wasn’t sure I could cut a straight line with it.  So, I made my own guide fence from a piece of angle aluminum and two clamps.  With this home-made contraption I was able to cut a piece close enough to square that I could use a file to finish it off by hand.  I don’t have a large workbench so we had to use the edge of our front porch.  I had to make sure to sweep up all the little bits of aluminum afterwards so that none of them end up embedded in the bottom of my bare feet on a later day.

Nibbler Fence

Next, John and I practiced bucking solid rivets.  He held the bucking bar and I ran the rivet gun.  The first time I pulled the trigger on the rivet gun nearly scared his pants off.  He didn’t expect it to make so much noise causing the piece of scrap aluminum to rattle.  But after a few practice runs, both he and I got the hang of it.

John held the patch in place and I drilled 1/8″ holes for the rivets, installing cleco’s in each hole to hold the patch in place.  After all the holes were drilled, we removed the cleco’s and then squirted plenty of Sikaflex sealant on the back of the patch before remounting them with the cleco’s.  We removed each cleco and bucked a rivet into each hole, one-by-one.  I made lots of smiley indentations on the second rivet.  Arrrgghhh!  Rookie mistake.  But the other three turned out pretty good.  To our surprise, as we drove in the last rivet, the grey body filler popped right out of its hole.  Then we had a another hole to patch!  Oh well, a patch is a better solution than body filler anyway.

Here is a picture of both patches installed.

Holes PatchedNot too bad for a couple of amateurs, right?  I think they will polish up nicely.

Now that the leaks are fixed, I’ll get back to replacing the floor.


Beginning the Front Floor Disassembly

No sooner had we returned from the trip to Pine Hill than I dove into the job of fixing the floor in the front of the trailer.  The floor right inside the entry door had been weak ever since we got the trailer.  When you step inside, the floor sags causing a tear in the belly pan.  You can see where a hole has rotted in the floor in the lower left corner of the picture below.  I also noticed that there was a hole where the floor had rotted in the front right corner of the trailer.  On Saturday I worked up the courage to dive into the project of fixing the floor.  It didn’t take long to remove the front gaucho.

Removed Front Gaucho

Then on Sunday I began drilling out the blind rivets holding the lower left interior wall panel.  The rivets that had a nice hole in the center were easy to remove.  But those where the shank had broken off above the head of the rivet were a major hassle.  It took quite a bit of time and emotional restraint to remove those rivets without expanding the holes too much.  I discovered that it’s actually easier to remove solid rivets!  To remove the solid rivets by the door I:

  • punched a guide hole with my center punch
  • drilled into the center of the rivet head with a #30 drill bit until the bit was sunk just through the head of the rivet
  • carefully used a hammer and a flat head screw driver to knock the remainder of the head off the rivet
  • used my hammer and a small punch to push the rest of the rivet out the hole.

I didn’t have any problems removing any of the solid rivets.

At this point all three lower interior panels have been removed.

Front Interior Panels RemovedNext I will take out some of that insulation and begin the task of cutting the bolts that attach the floor to the body of the trailer.

Stay tuned for more updates.

Pine Hill Campground

Last weekend we met our fellow Airstream club members at Pine Hill Campground in Krumsville, PA.  I nearly forgot how much I enjoy spending time with all those nice folks.

The campground was extremely well maintained.  The sites were level with fresh gravel.  The grass between each site was kept like a well manicured lawn.  The view was wonderful with IMG_0646colorful rolling hills and mountains in the background.  The campsite is conveniently located off of I-78, but the drawback is that you can see and hear all of the highway traffic.  On that particular weekend we spent time watching cars sit at an idle on the road waiting for roadwork to be completed.  We were glad we were not in that traffic snarl.

On the first evening we stayed at the campsite enjoying delicious chili made by one of the club members and finger foods contributed by everyone else.  The campground had WiFi so Angie and I were able to watch a couple of episodes of the BBC television program “The Paradise” on our iPad before going to bed.  We love that show.  Can’t wait until we can see the next season.

We didn’t run our little electric heater in the camper overnight, but we did have 2 down comforters to sleep under.  Most of me was very warm, but my nose was cold from the 45 degree overnight temperatures.  When we woke up in the morning we turned the little heater on which kept the camper comfortable until it was time to get up and go outside.

The next morning we made coffee with our little Coleman burner and our Chemex coffee maker.  We had continental breakfast and then hit the road for some exploring.  First we went to Renninger’s Antique Market in Kutztown.  Some interesting stuff there.  We walked only through the building with free admission.  I bought a small graduated measuring cup that I plan to use to make the perfect margarita.

Next we drove to Hellertown to have lunch at a Hungarian restaurant named “Paprika’s”.  My friend and I came across this restaurant last fall on our bike ride from Bryn Mawr to Bethlehem. Service was very slow this time, but the food was still good.  We had chicken paprikash, goulash soup, andPaprikas Restaurant a crepe filled with strawberry filling for dessert.

We drove on lovely country roads making our way back to the campground.  By the time we arrived it was almost time for the camp-wide potluck dinner.  We contributed grilled sausages and homemade sauerkraut.  After dinner one of the club members gave a slide show presentation on the history of drive-in theaters.  That brought back a few memories!  It turned out that there was a drive-in still operating just a few miles from the campground.  Unfortunately, we didn’t have time to go.  Maybe next time.

On our final day we stopped by Dietrich’s Meats to purchase a few items to take home.  You will find almost every part of a pig on display at Dietrich’s including feet, skin, snouts, trachea, and ears.  We bought porterhouse steaks that we planned to grill at home.  (They turned out to be absolutely delicious.  I would almost considering driving the two hours from our home to Dietrich’s just to stock up on meats for our deep freezer!)  We bought some hot sticks for snacking on, clear birch beer, bologna, liverwurst, bread, and a pie.  We also bought a smoked pig’s head for a friend who said that she wanted to cook it.  Dietrich’s put the head in a box for us to take home.  I haven’t yet heard how our friend prepared it, but I will be sure to ask the next time I see her.

Smoked Pigs Head

Roof Vent Cover Repairs

After returning from our trip to Don Laine Campground I removed the roof vent cover and took a closer look.  Here is a picture showing the frame with the plexiglass missing.  Only one of the crank/lifters remains (circled on left).  The other fell off last year while we were driving down the road.  If you click on the image to view the higher resolution version of the image below you’ll see where a previous owner glued foam around the perimeter of the frame.  If you look very closely you’ll see the thin line of clear silicone around the outer edge as well.  That silicone was the only thing holding the plexiglass in place.  When the wind got underneath, of course the plexiglass flew right out.

RoofVent2


As I spent a few minutes trying to figure out how to secure a new piece of plexiglass into the frame I realized that that foam shouldn’t be there!  I could replace the foam with butyl tape (left over from my previous window replacement work) which would adhere the plexiglass to the frame.  After I pulled back the foam I realized that I would not need to seal around the perimeter of the glass with silicone, as a previous owner had, because there is a gutter underneath that would catch the little bit of water that might seep between the edge of the frame and the glass.  But then I saw that a previous owner had blocked the weep holes that would allow the gutter to drain.  Argh!

RoofVent4


I spent a couple of hours removing all of the foam, glue, and silicone.  Once it was all cleaned up I laid down some black butyl tape and then pressed the new plexiglass into place.

RoofVent5


Shortly after reinstalling the vent cover, it rained.  I’m happy to say that not a drop of water dripped into the camper.  I used wire to fasten the cover to the vent opening.  That should keep the wind from blowing it off.  In the meantime I’ll try to find a replacement crank/lifter so that we can actually open the vent when needed.